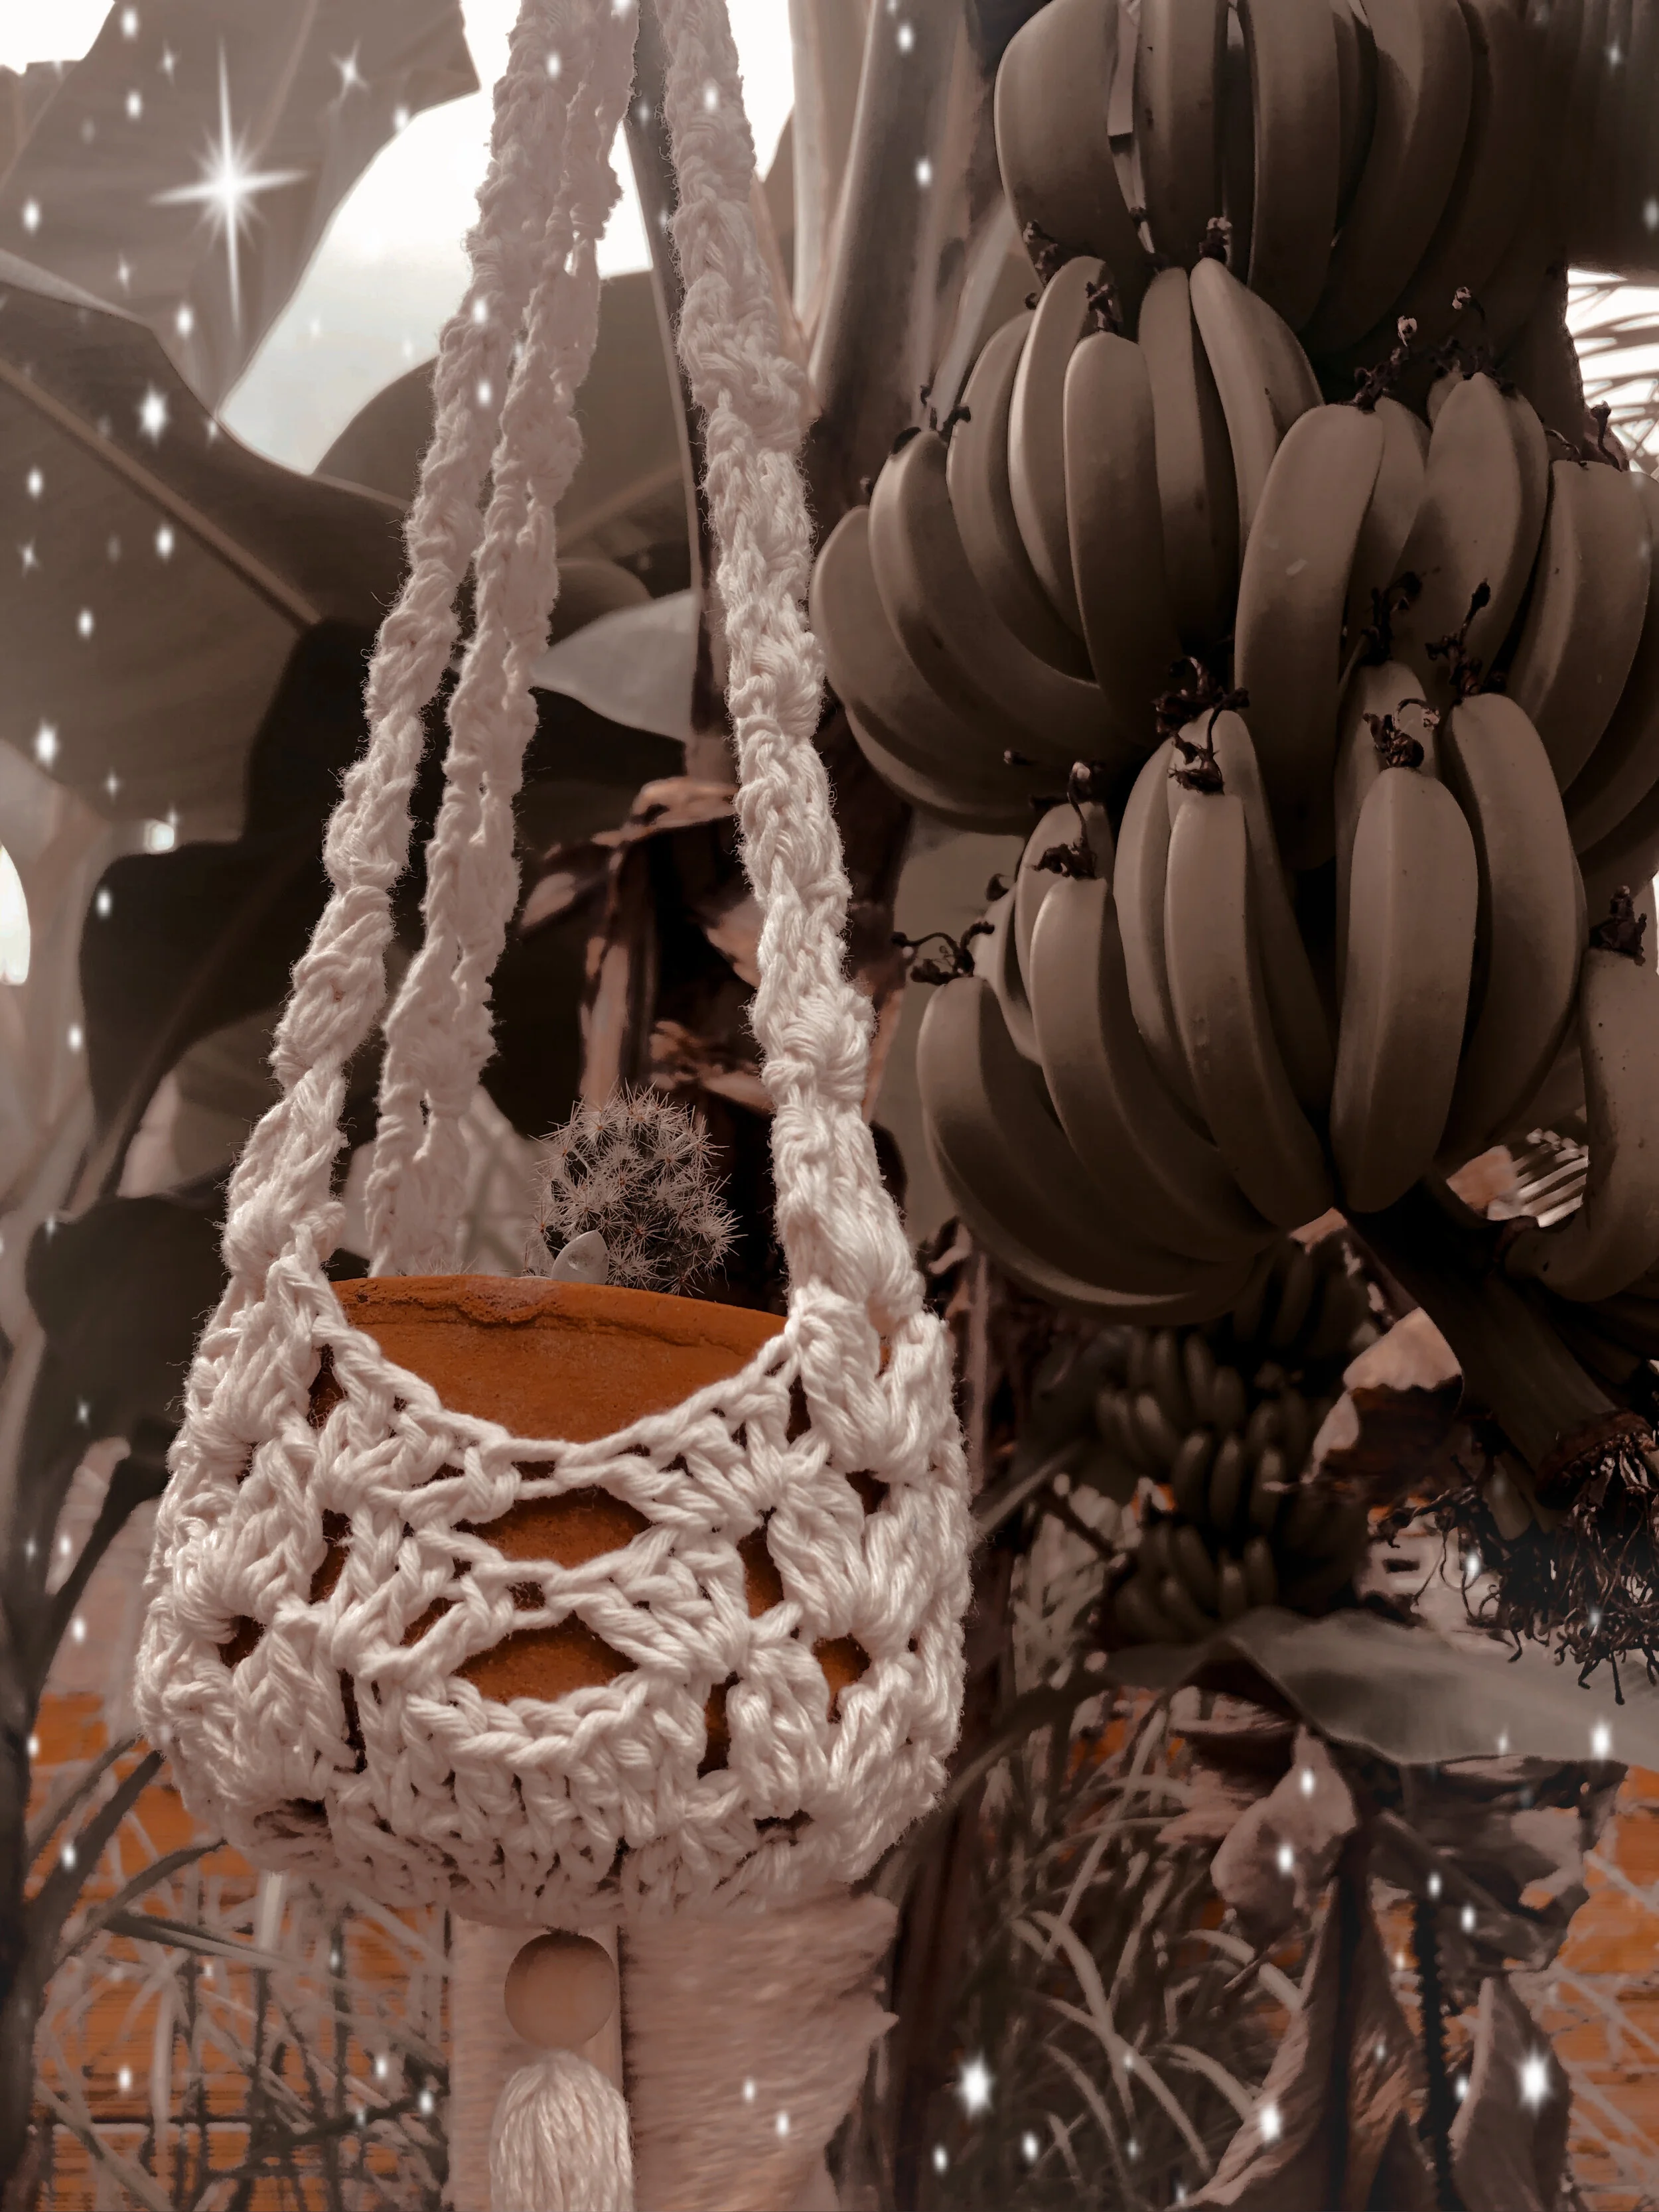
FREE Boho Plant Hanger Crochet Pattern

Learn how to make a cute plant hanger with us!
This pattern was inspired by our love for plants so I had to make a cute plant hanger for my plant babies. We used 100% worsted weight white cotton yarn by Premier yarns for this project. It was such a delight working with this beautiful yarn. We usually place our plants in our garden or gallery and it holds up so well in the sunshine and even in rainy weather. I would definitely recommend using 100% cotton yarn if you plan on placing this plant hanger outside your home. Cotton yarn holds up really well even when it gets wet (when you water your plants) or if you need to wash and dry your beautiful piece! US terminology is used in this pattern.
MARTERIALS NEEDED:
50g-100g of any Yarn of your choice
Crochet Hook 4.5 mm
Stainless steel ring
Beginner - Intermediate crochet skill level
Wooden Bead (optional)
Small book / CD case to create tassel
Crochet Needle
Plant & pot of your choice
LETS GET STARTED !
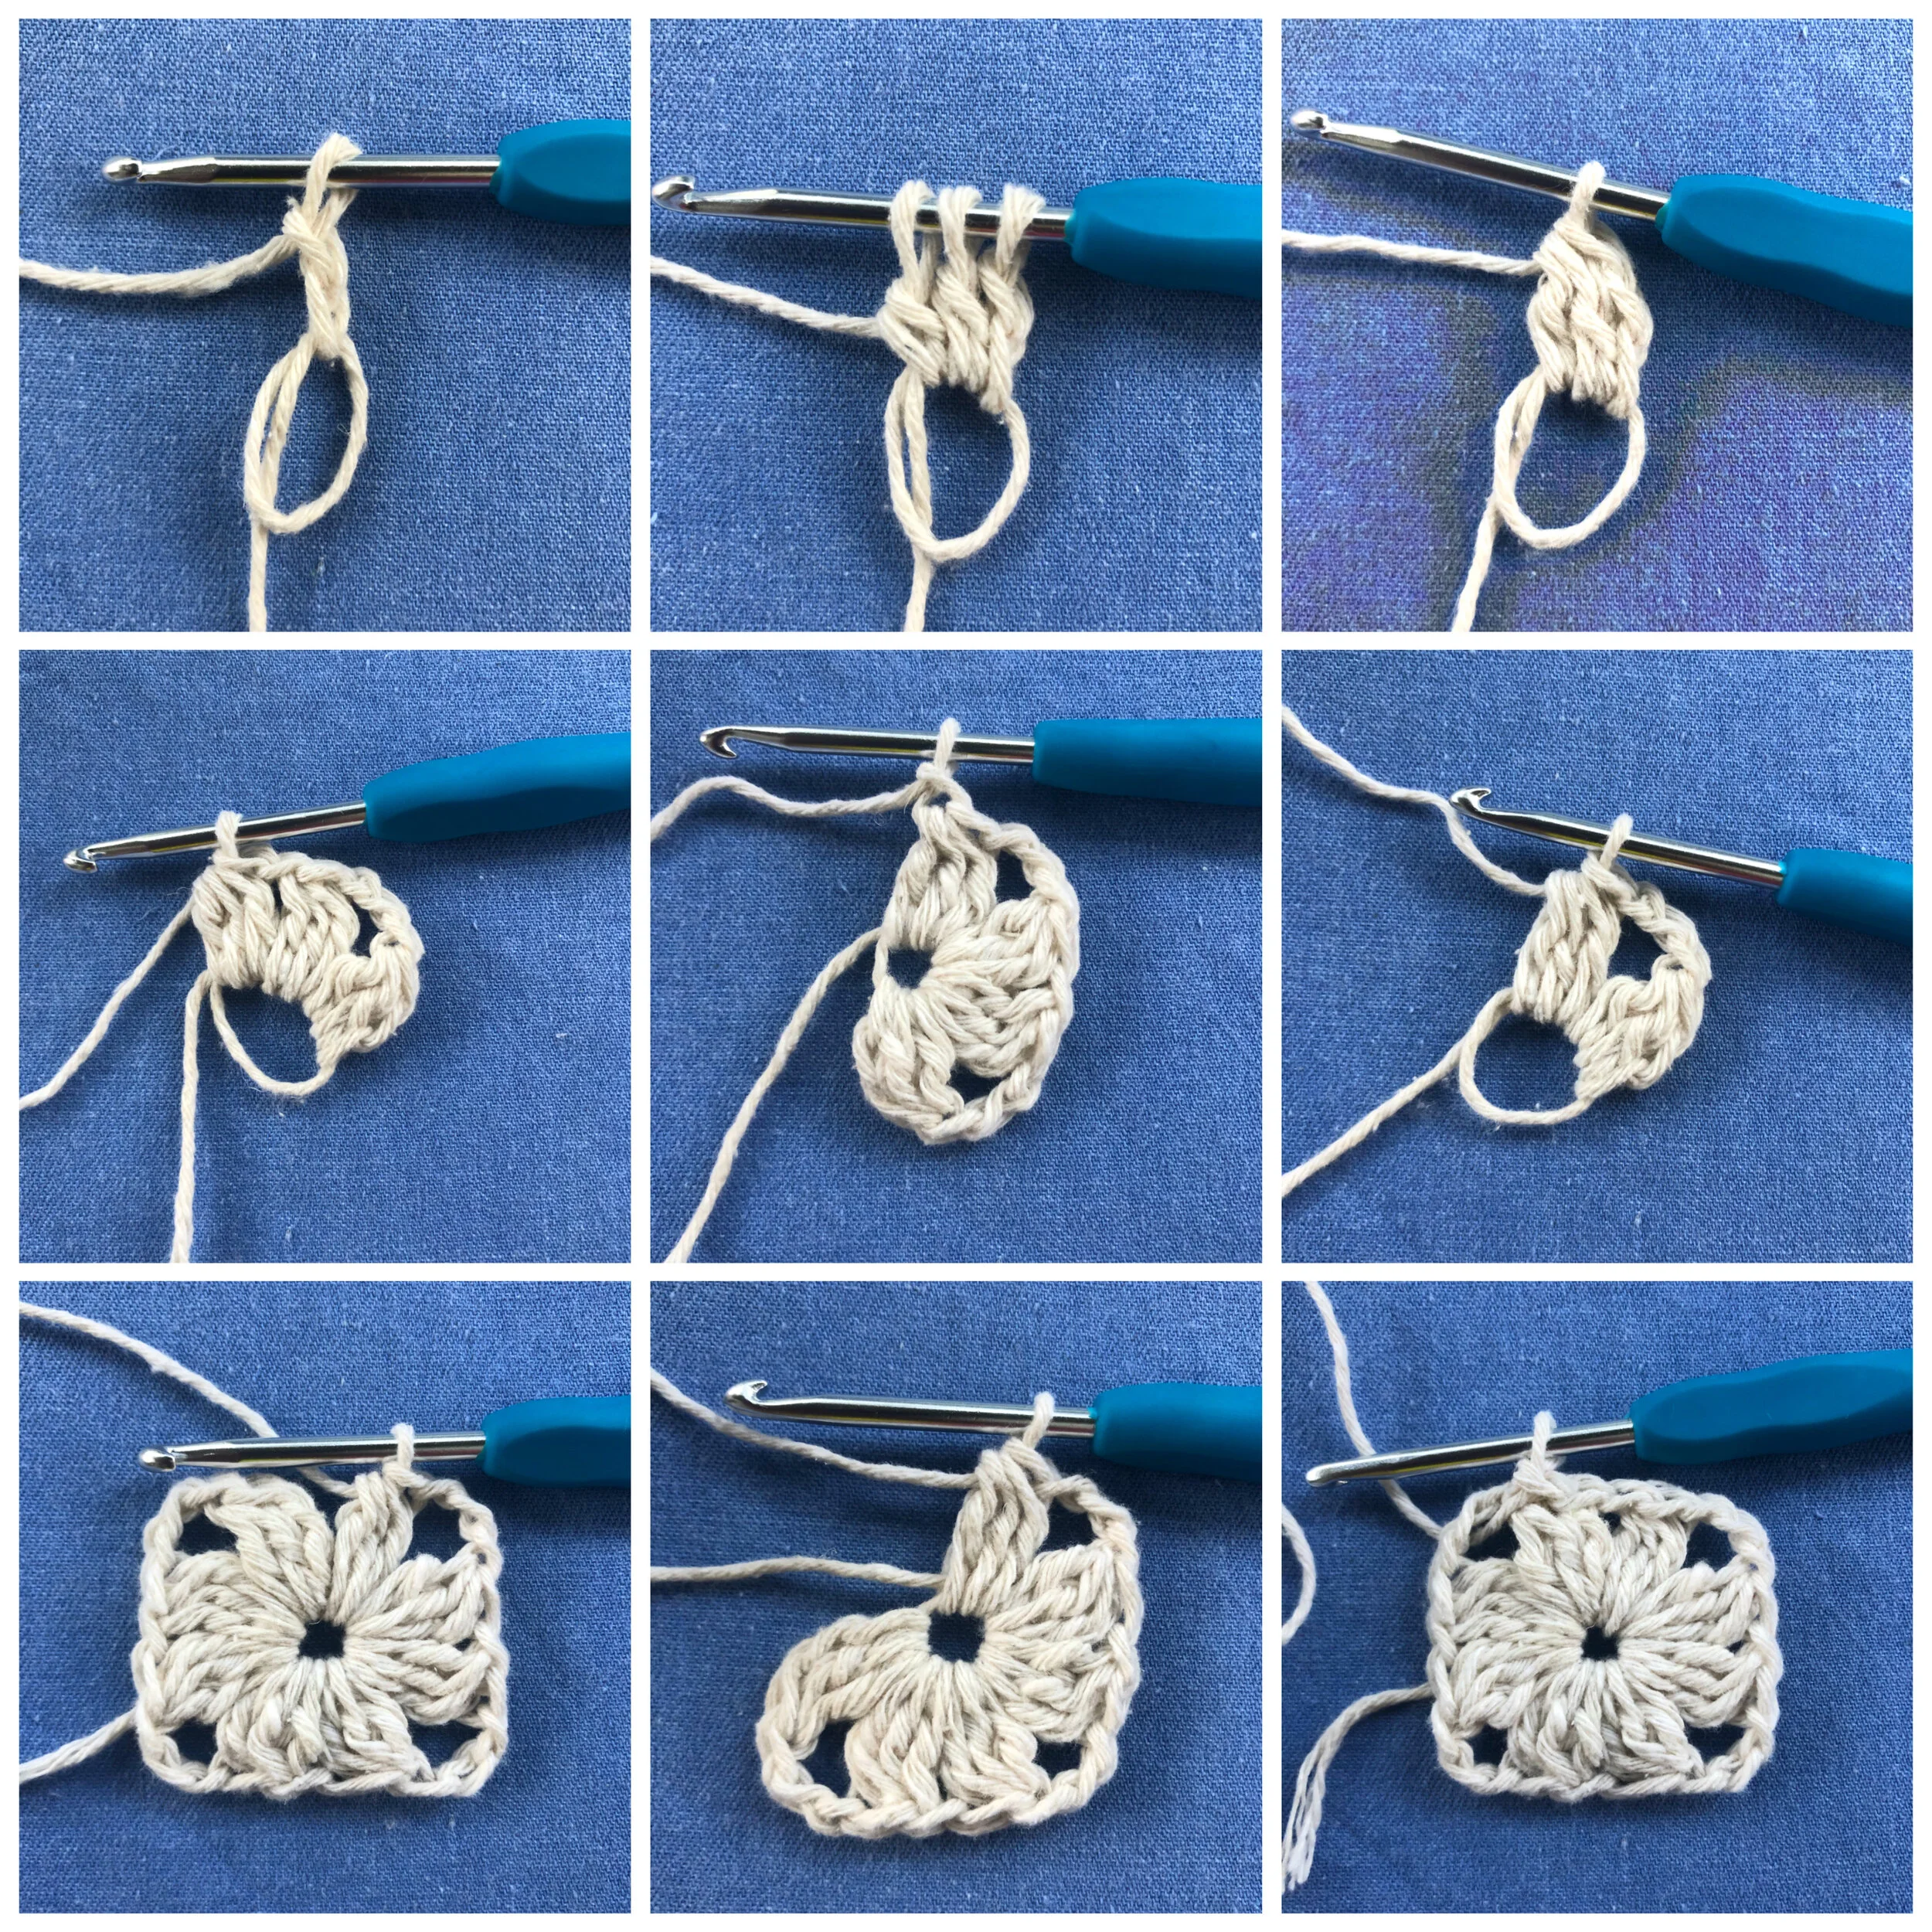
Round 1: Create a Magic Ring then CH2 loosely (counts as a DC)
Create a 3DC cluster into the ring (this includes the first DC that is CH2)
CH3, then Create another 3DC cluster into the ring
This is now your first corner space.
CH1 & create another 3DC Cluster into the ring. CH3 & create another 3DC cluster.
This is your second corner space.
CH1 & Create another 3DC Cluster into the ring. CH3 & create another 3DC Cluster.
This is your third corner space.
CH1 & create another 3DC cluster into the ring. CH3 & create another 3DC cluster.
This is your fourth and last corner space.
CH1 & SS into the top of the first cluster then SS again into the first CH3 space.
Tighten the loose end.
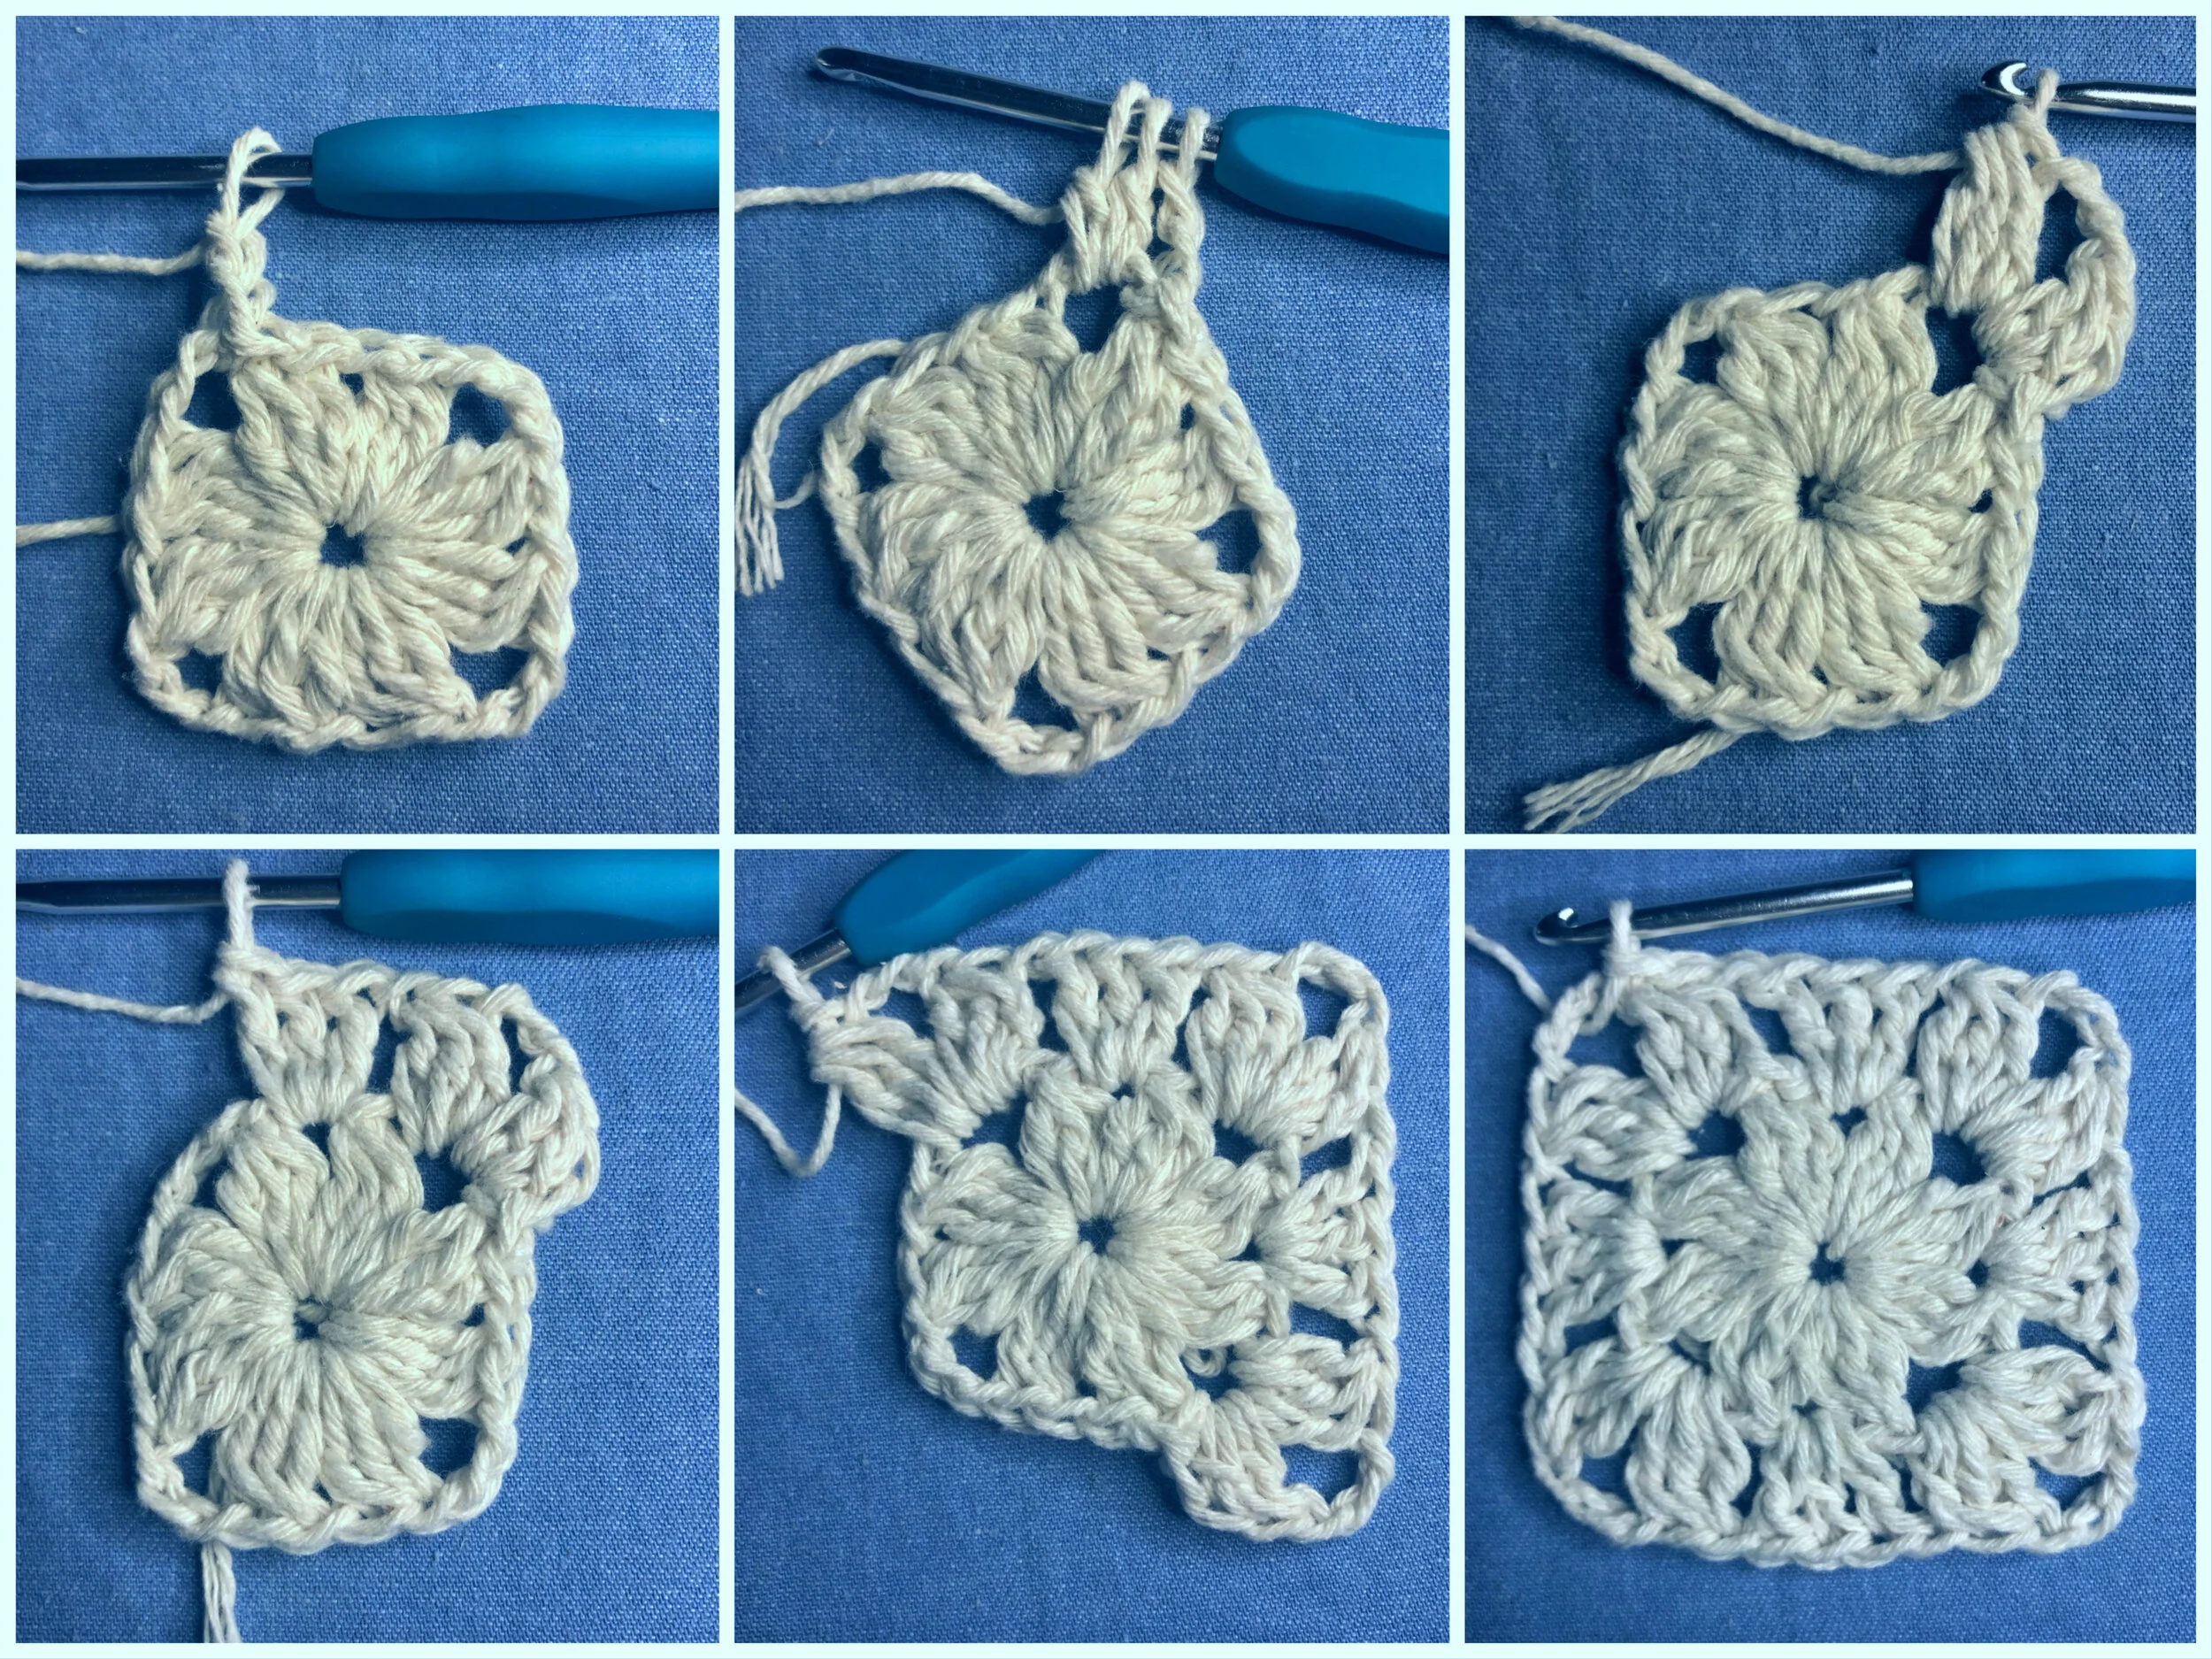
Round 2: CH2 & Create a 3DC cluster into the first corner CH3 space (CH2 counts as a DC)
CH3, then create another CH3 Cluster into the corner CH3 space.
CH1 & DC 3 times into the CH1 space from the previous round.
CH1 & create 3DC cluster, CH3, 3DC cluster all into the corner space.
CH1 & DC 3 times into the CH1 space from the previous round.
CH1 & create 3DC cluster, CH3, 3DC cluster all into the corner space.
CH1 & DC 3 times into the CH1 space from the previous round.
CH1 & create 3DC cluster, CH3, 3DC cluster all into the corner space.
CH1 & DC 3 times into the last CH1 space from the previous round.
CH1 & SS into the top of the first cluster from the beginning of the round.
SS again into the CH3 corner space.
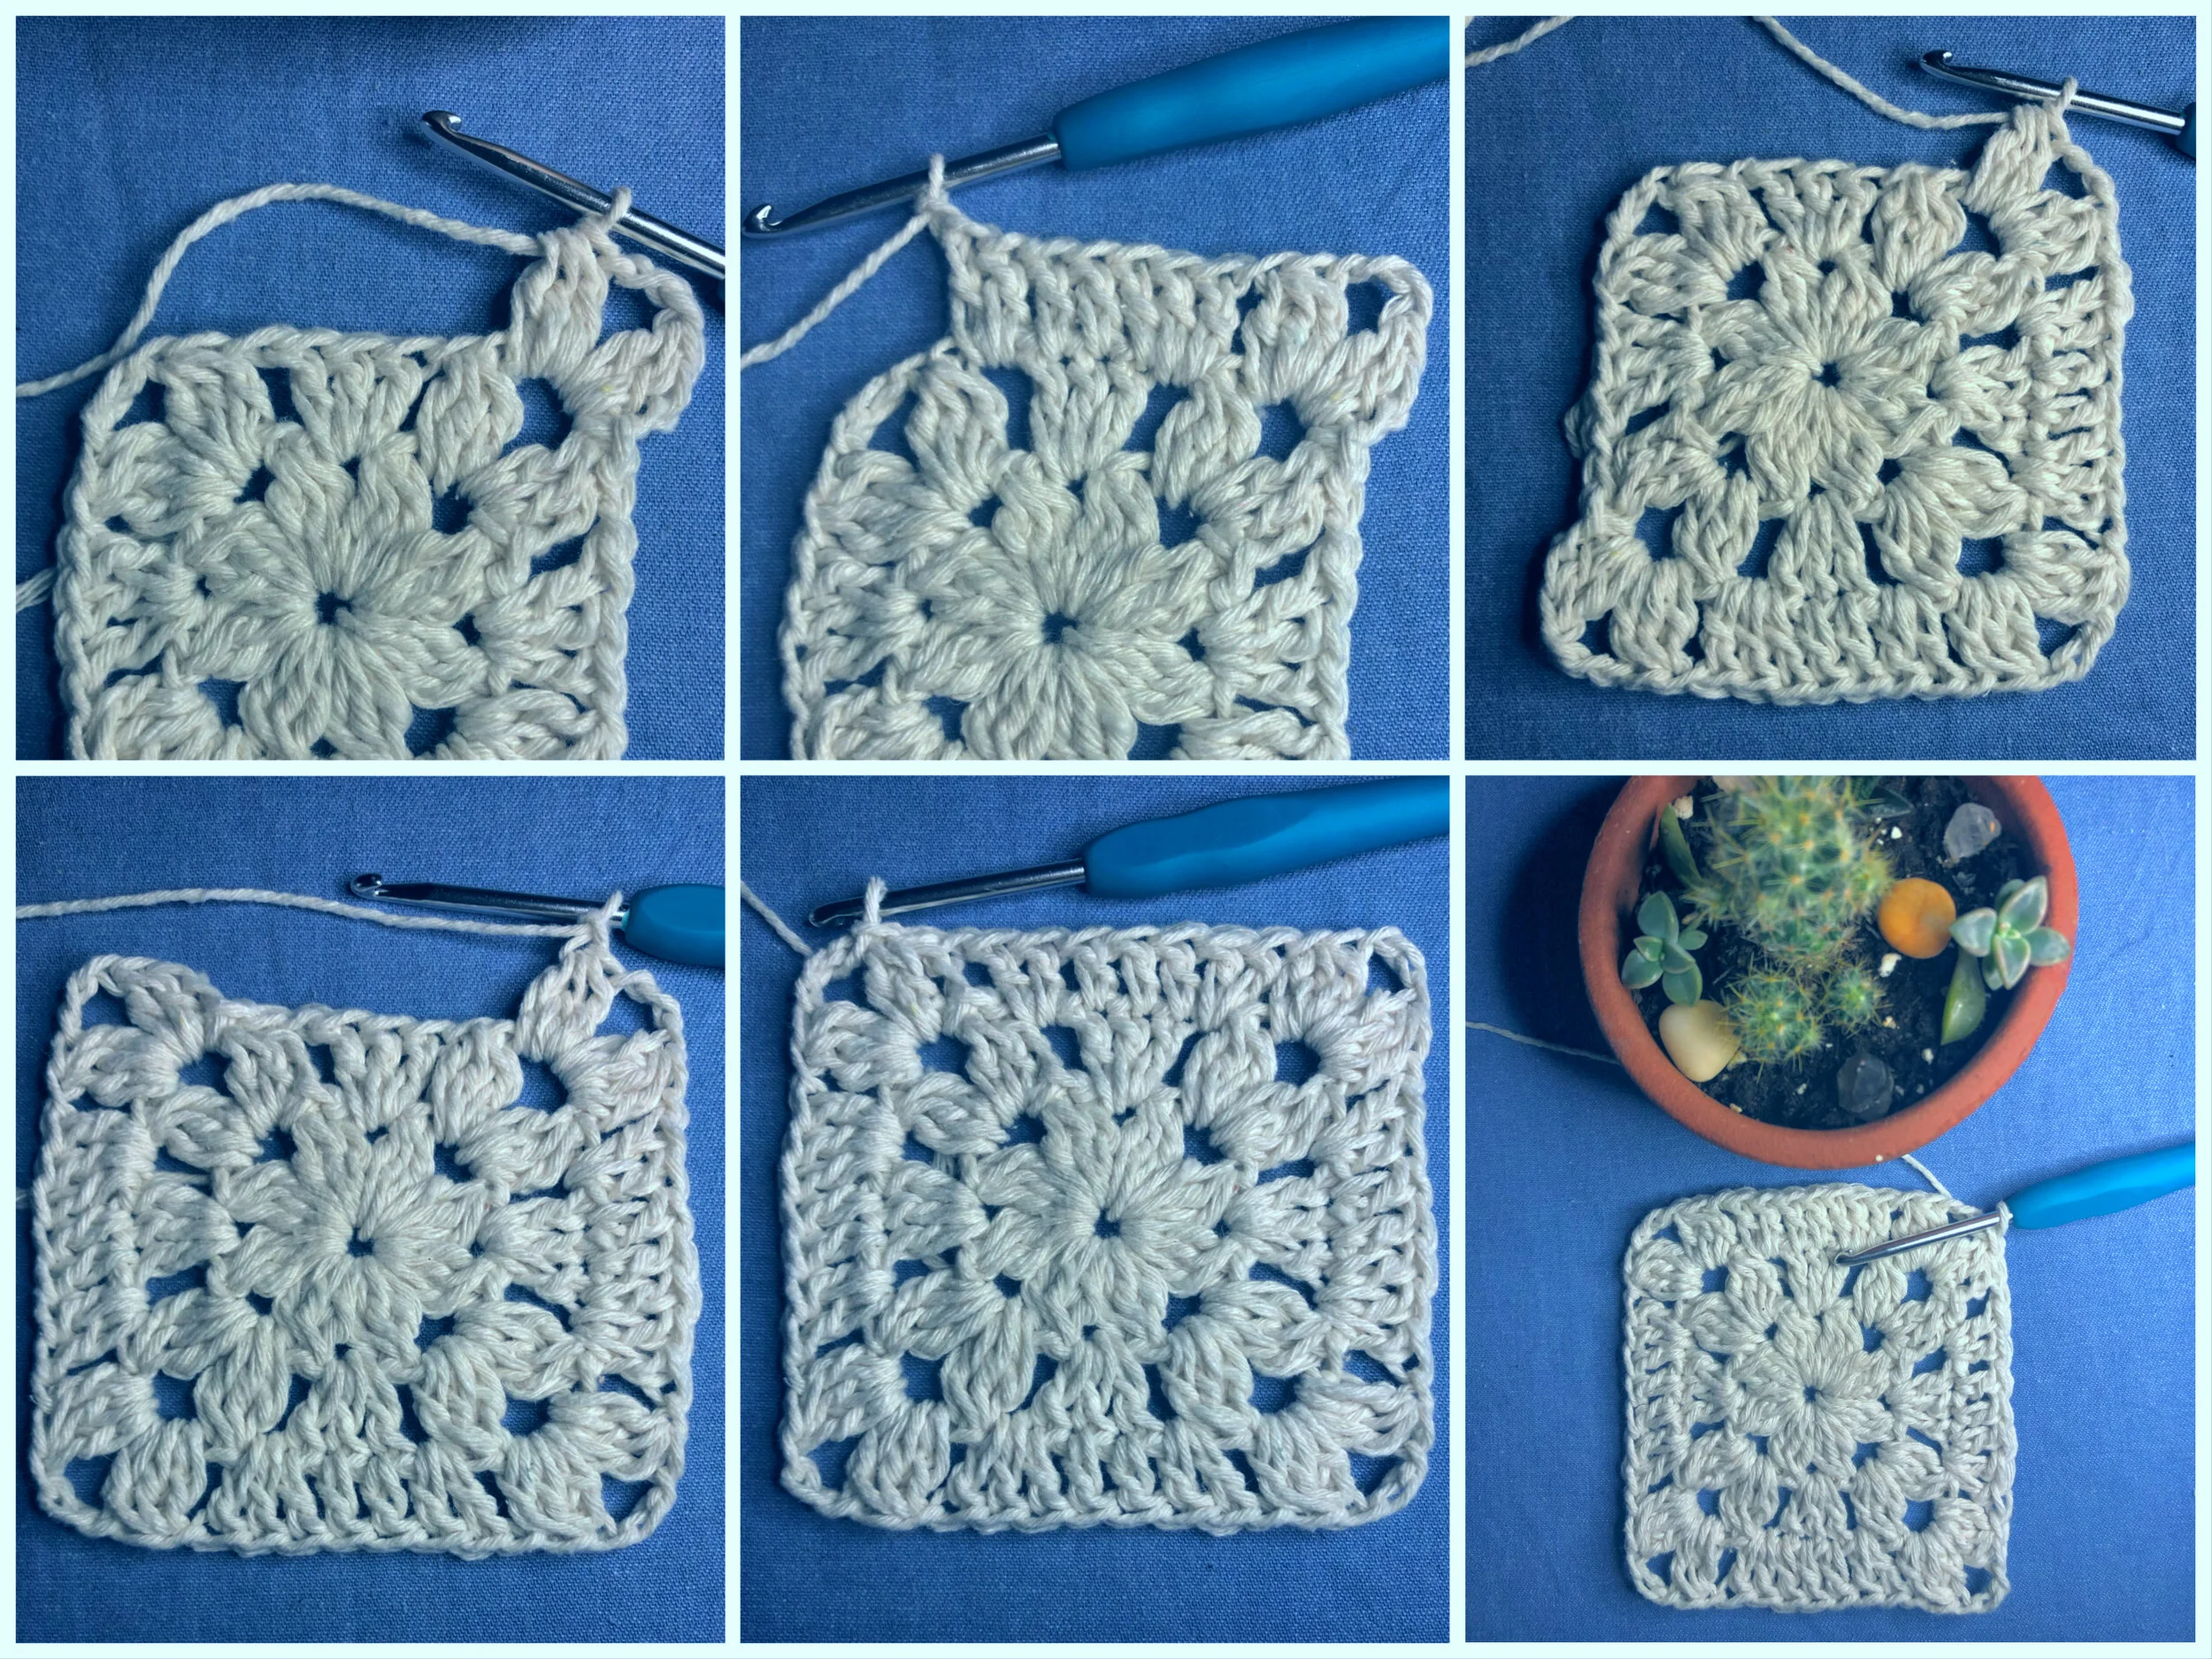
Round 3: CH2 & Create a 3DC cluster into the first corner CH3 space (CH2 counts as a DC)
CH3, then create another CH3 Cluster into the corner CH3 space.
CH1 & DC 2 times into the first CH1 space from previous round.
DC 1 time into each of the 3 DC from previous round. DC 2 times into the CH1 space.
CH1 & create 3DC cluster, CH3, 3DC cluster all into the corner space.
CH1 & DC 2 times into the CH1 space from previous round.
DC 1 time into each of the 3 DC from previous round. DC 2 times into the CH1 space.
CH1 & create 3DC cluster, CH3, 3DC cluster all into the corner space.
CH1 & DC 2 times into the CH1 space from previous round.
DC 1 time into each of the 3 DC from previous round. DC 2 times into the CH1 space.
CH1 & create 3DC cluster, CH3, 3DC cluster all into the corner space.
CH1 & DC 2 times into the CH1 space from previous round.
DC 1 time into each of the 3 DC from previous round. DC 2 times into the CH1 space.
CH1 & SS on top the first cluster of the previous round. SS again into the CH3 corner space.
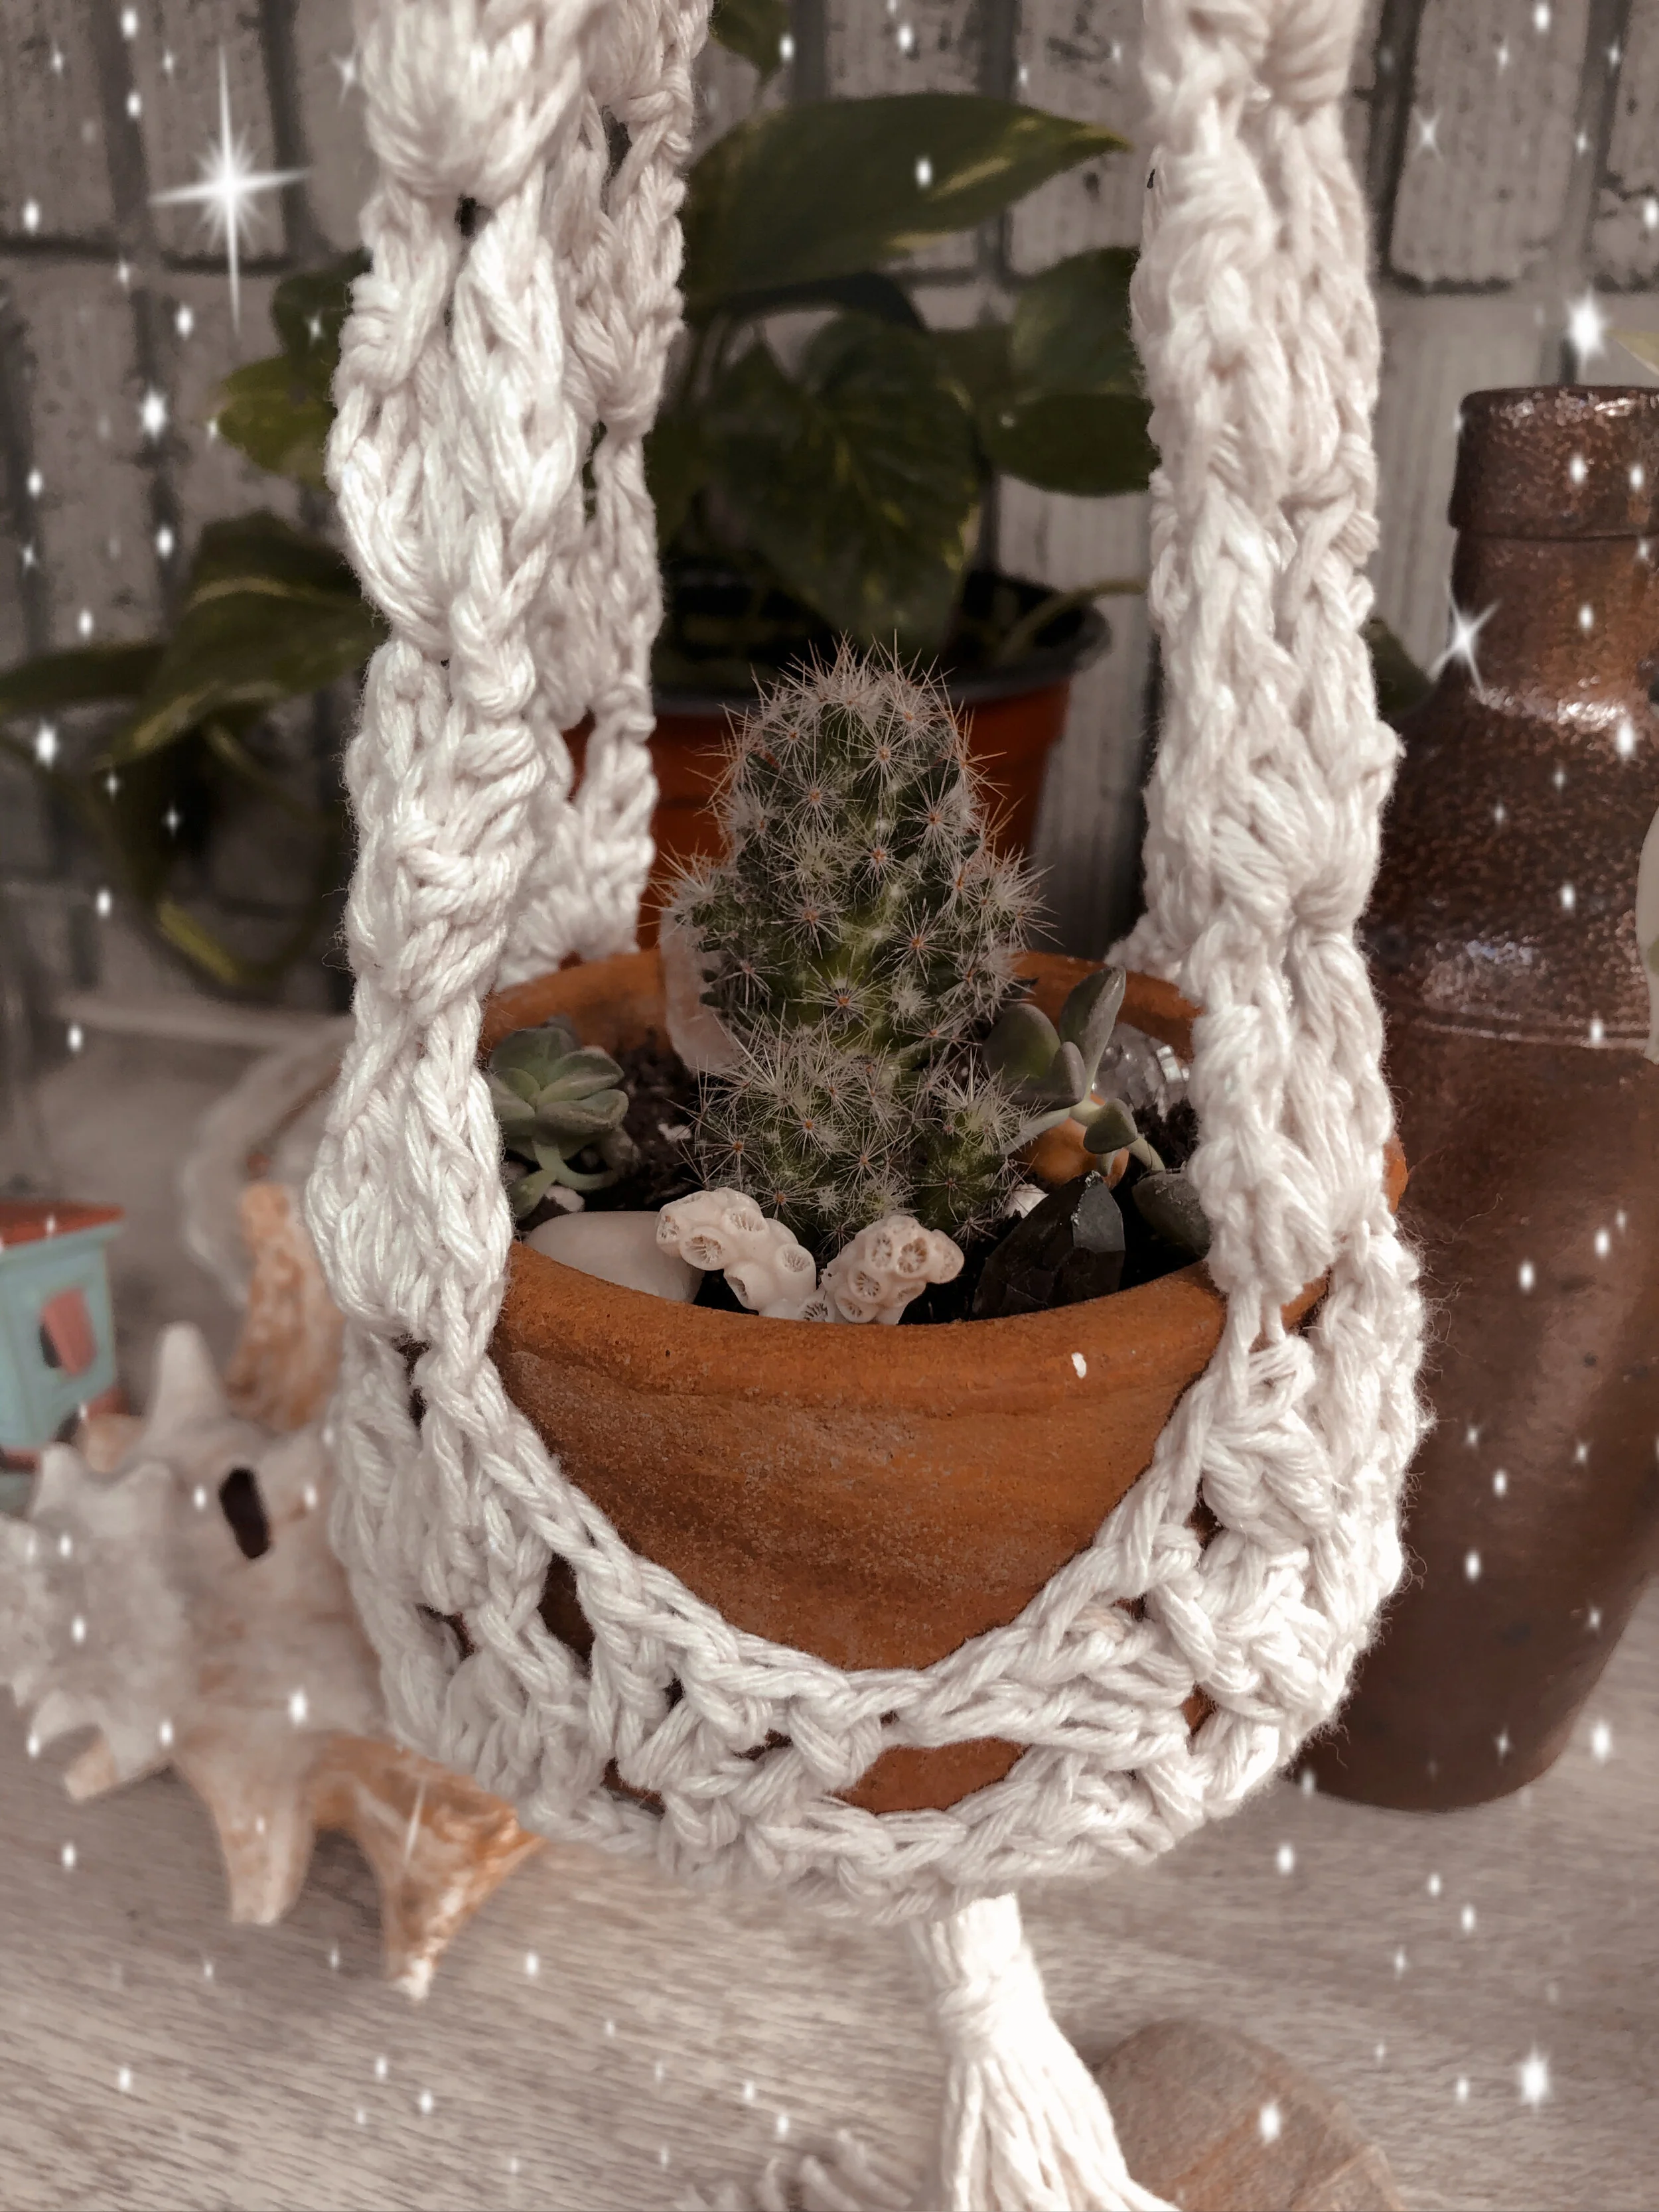
The Square you create here should be able to fit the diameter of the bottom of your pot.
If your pot is larger, feel free to repeat the steps in the previous round to make your square bigger
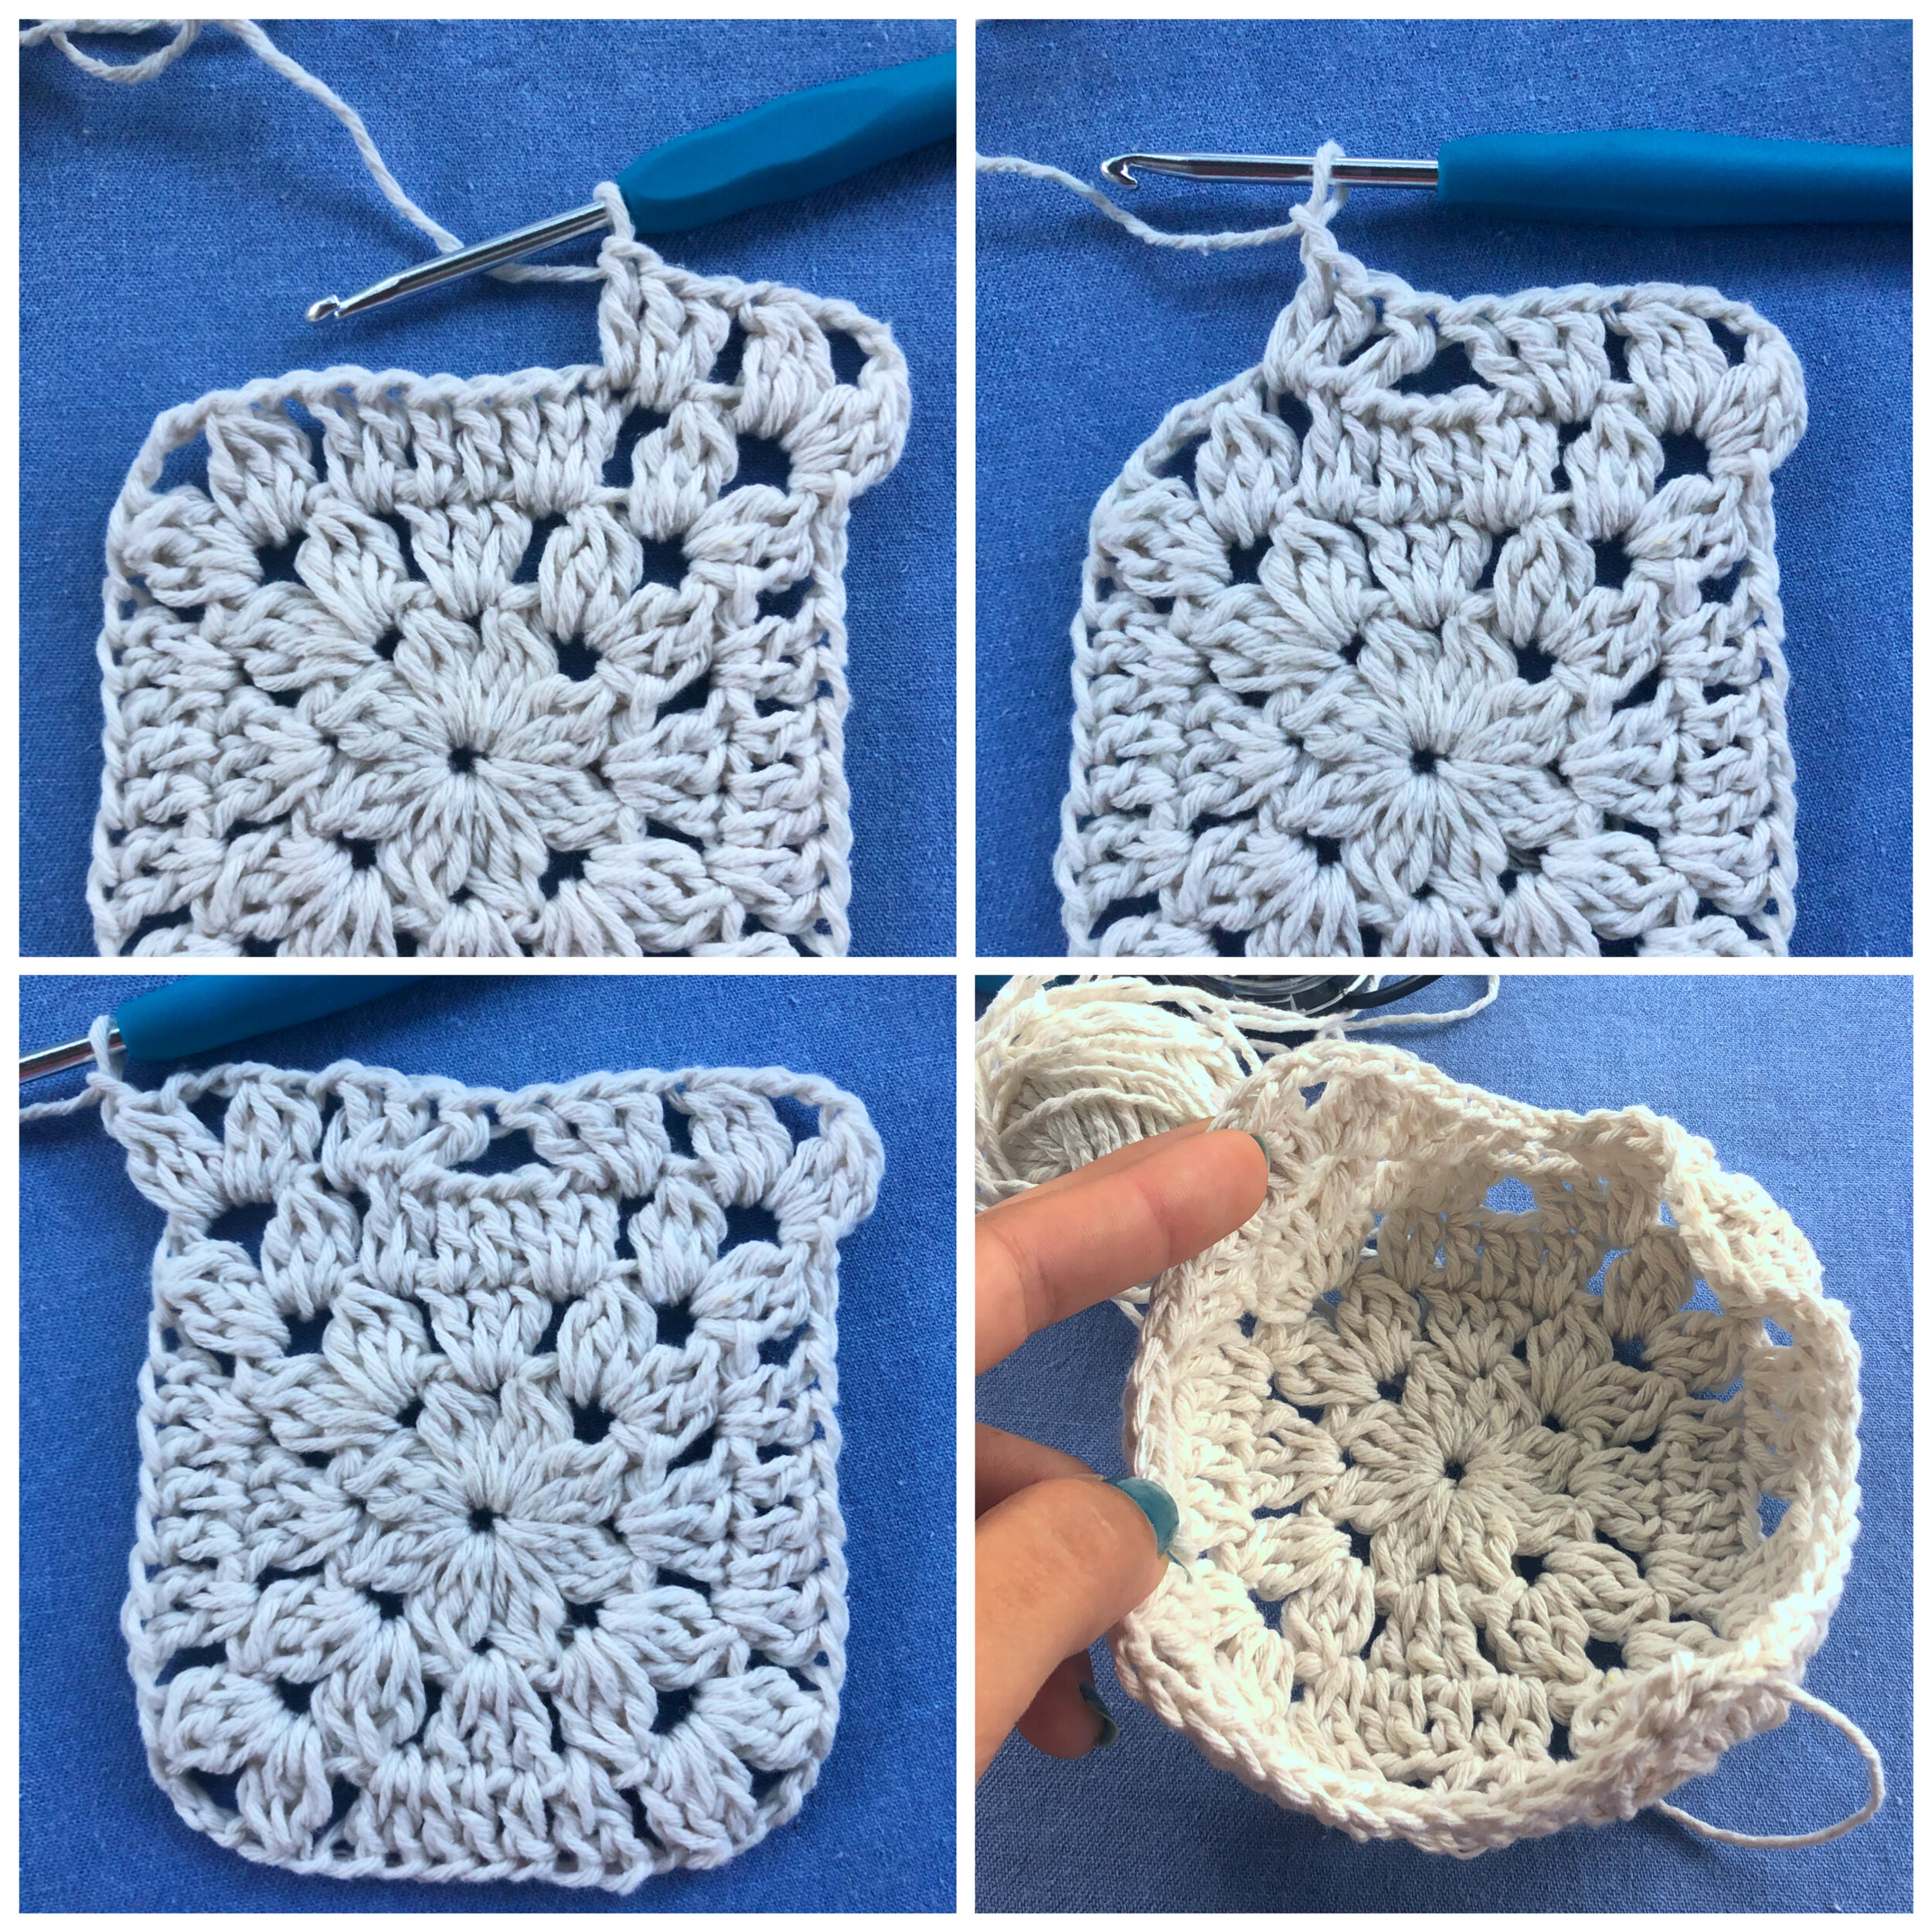
Round 4: CH2 & Create a 3DC cluster into the first corner CH3 space (CH2 counts as a DC)
CH3, then create another CH3 Cluster into the corner CH3 space.
CH1 & DC 2 times into the first CH1 space from previous round.
DC 1 time into the first DC from previous round. Skip 5 stitches and DC 1 time into the last DC.
DC 2 times into the CH 1 space.
CH 1 & Create 3DC cluster, CH3, 3D Cluster all into the corner space.
CH1 & DC 2 times into the CH1 space from previous round.
DC 1 time into the first DC from previous round. Skip 5 stitches and DC into the last DC.
DC 2 times into the CH 1 space.
CH 1 & Create 3DC cluster, CH3, 3D Cluster all into the corner space.
CH1 & DC 2 times into the CH1 space from previous round.
DC 1 time into the first DC from previous round. Skip 5 stitches and DC 1 time into the last DC.
DC 2 times into the CH 1 space.
CH 1 & Create 3DC cluster, CH3, 3D Cluster all into the corner space.
CH1 & DC 2 times into the CH1 space from previous round.
DC 1 time into the first DC from previous round. Skip 5 stitches and DC 1 time into the last DC.
DC 2 times into the CH 1 space. CH1 & SS into the top of the first cluster from the beginning of the round. SS one more time into the CH3 corner space.
Round 5: CH2 & Create a 3DC cluster into the first corner CH3 space (CH2 counts as a DC)
CH3, then create another CH3 Cluster into the corner CH3 space.
CH1 & DC 2 times into the first CH1 space from previous round.
DC 1 time into the first DC from previous round. Skip 4 stitches and DC 1 time into the last DC.
DC 2 times into the CH 1 space.
CH 1 & Create 3DC cluster, CH3, 3D Cluster all into the corner space.
CH1 & DC 2 times into the CH1 space from previous round.
DC 1 time into the first DC from previous round. Skip 4 stitches and DC into the last DC.
DC 2 times into the CH 1 space.
CH 1 & Create 3DC cluster, CH3, 3D Cluster all into the corner space.
CH1 & DC 2 times into the CH1 space from previous round.
DC 1 time into the first DC from previous round. Skip 4 stitches and DC into the last DC.
DC 2 times into the CH 1 space.
CH 1 & Create 3DC cluster, CH3, 3D Cluster all into the corner space.
CH1 & DC 2 times into the CH1 space from previous round.
DC 1 time into the first DC from previous round. Skip 4 stitches and DC into the last DC.
DC 2 times into the CH 1 space.
CH 1 & Create 3DC cluster, CH3, 3D Cluster all into the corner space.
CH1 & DC 2 times into the CH1 space from previous round.
DC 1 time into the first DC from previous round. Skip 4 stitches and DC into the last DC.
DC 2 times into the last CH 1 space. CH1 & SS into the top of the first cluster from the beginning of the round. SS again into the CH3 corner space. Do not cut and fasten off yarn.

Top 4 cords:
Continue from where you left off. CH2 & Create a 3DC cluster into the corner CH3 space
(CH2 counts as a DC)
CH3, then create another CH3 Cluster into the corner CH3 space. Turn your work.
CH2 & Create a 3DC cluster into the corner CH3 space
(CH2 counts as a DC)
CH3, then create another CH3 Cluster into the corner CH3 space.
Repeat these steps & create a cord as long as you’d like it to be. Keeping in mind that you will need to create 3 more identical cords with the same number of rows as the first cord you create.
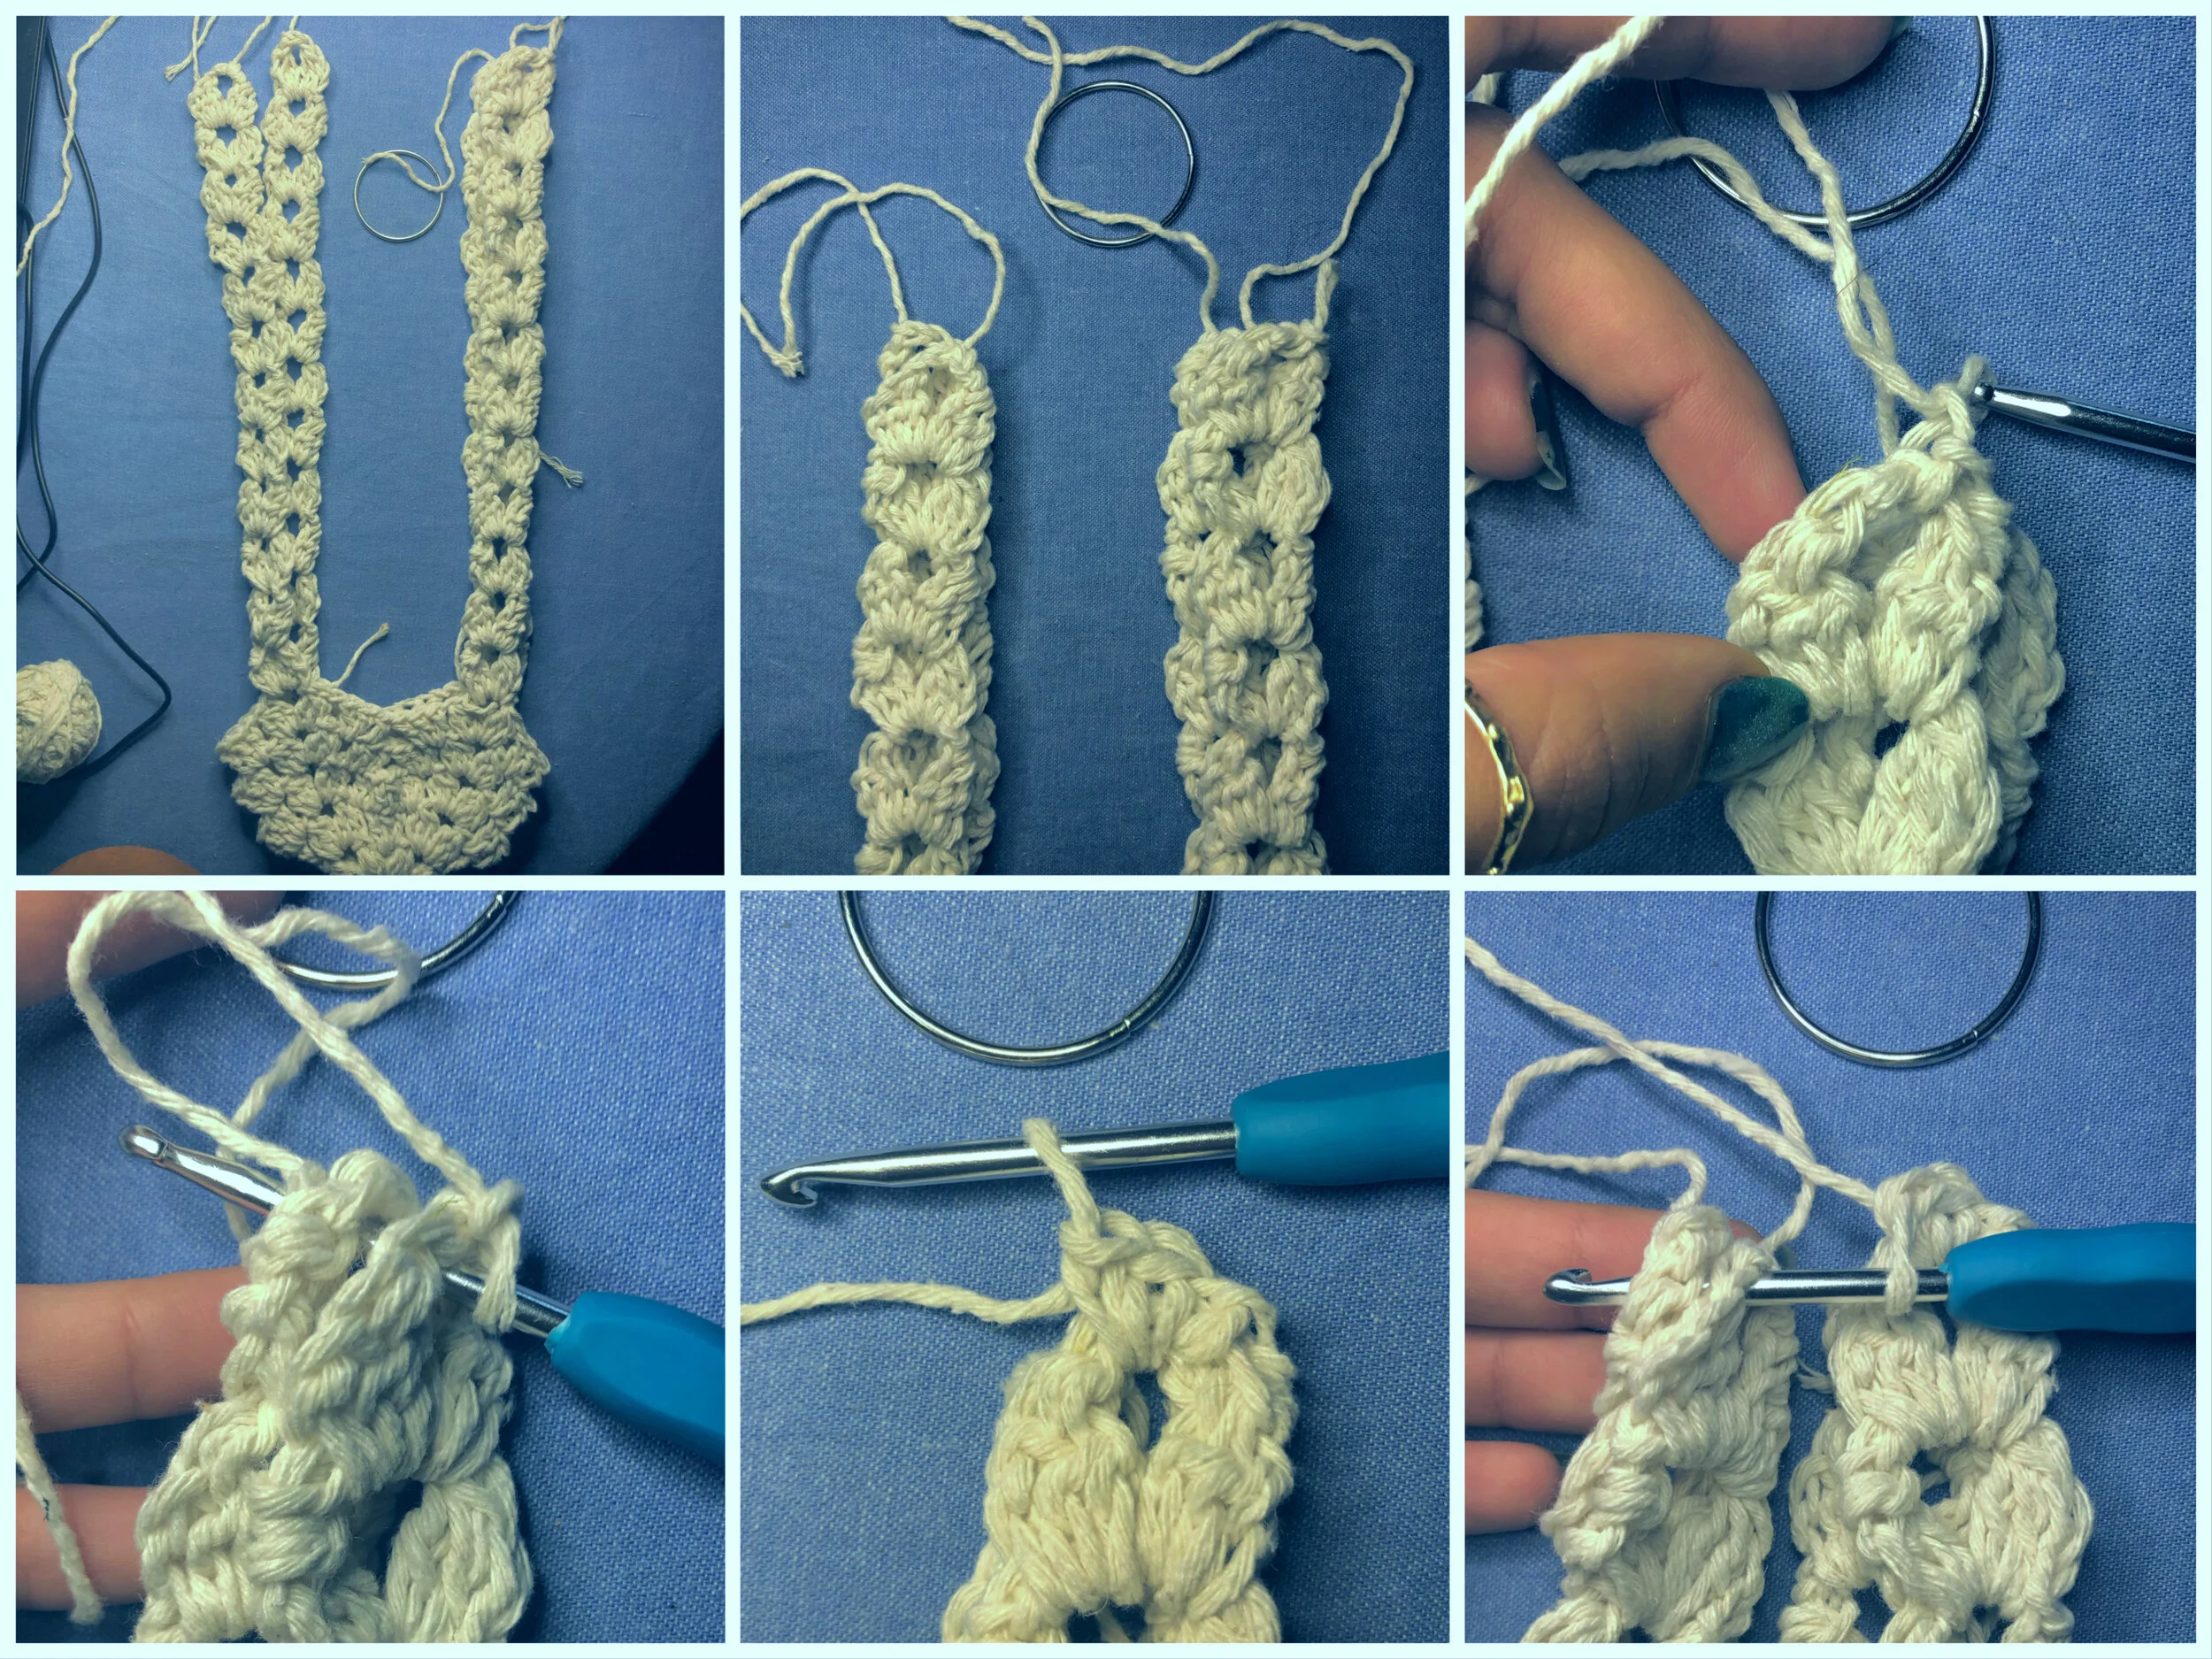
In my case, I created 12 rows of 3DC cluster, CH3, 3DC cluster.
Cut and fasten off your yarn. Attach yarn onto another corner by creating a simple double knot.
CH2 & Create a 3DC cluster into the corner CH3 space
(CH2 counts as a DC)
CH3, then create another CH3 Cluster into the corner CH3 space. Turn your work.
Continue creating your cords for the two following corners in the same way.
Do not cut and fasten off yarn when you finish your last cord.

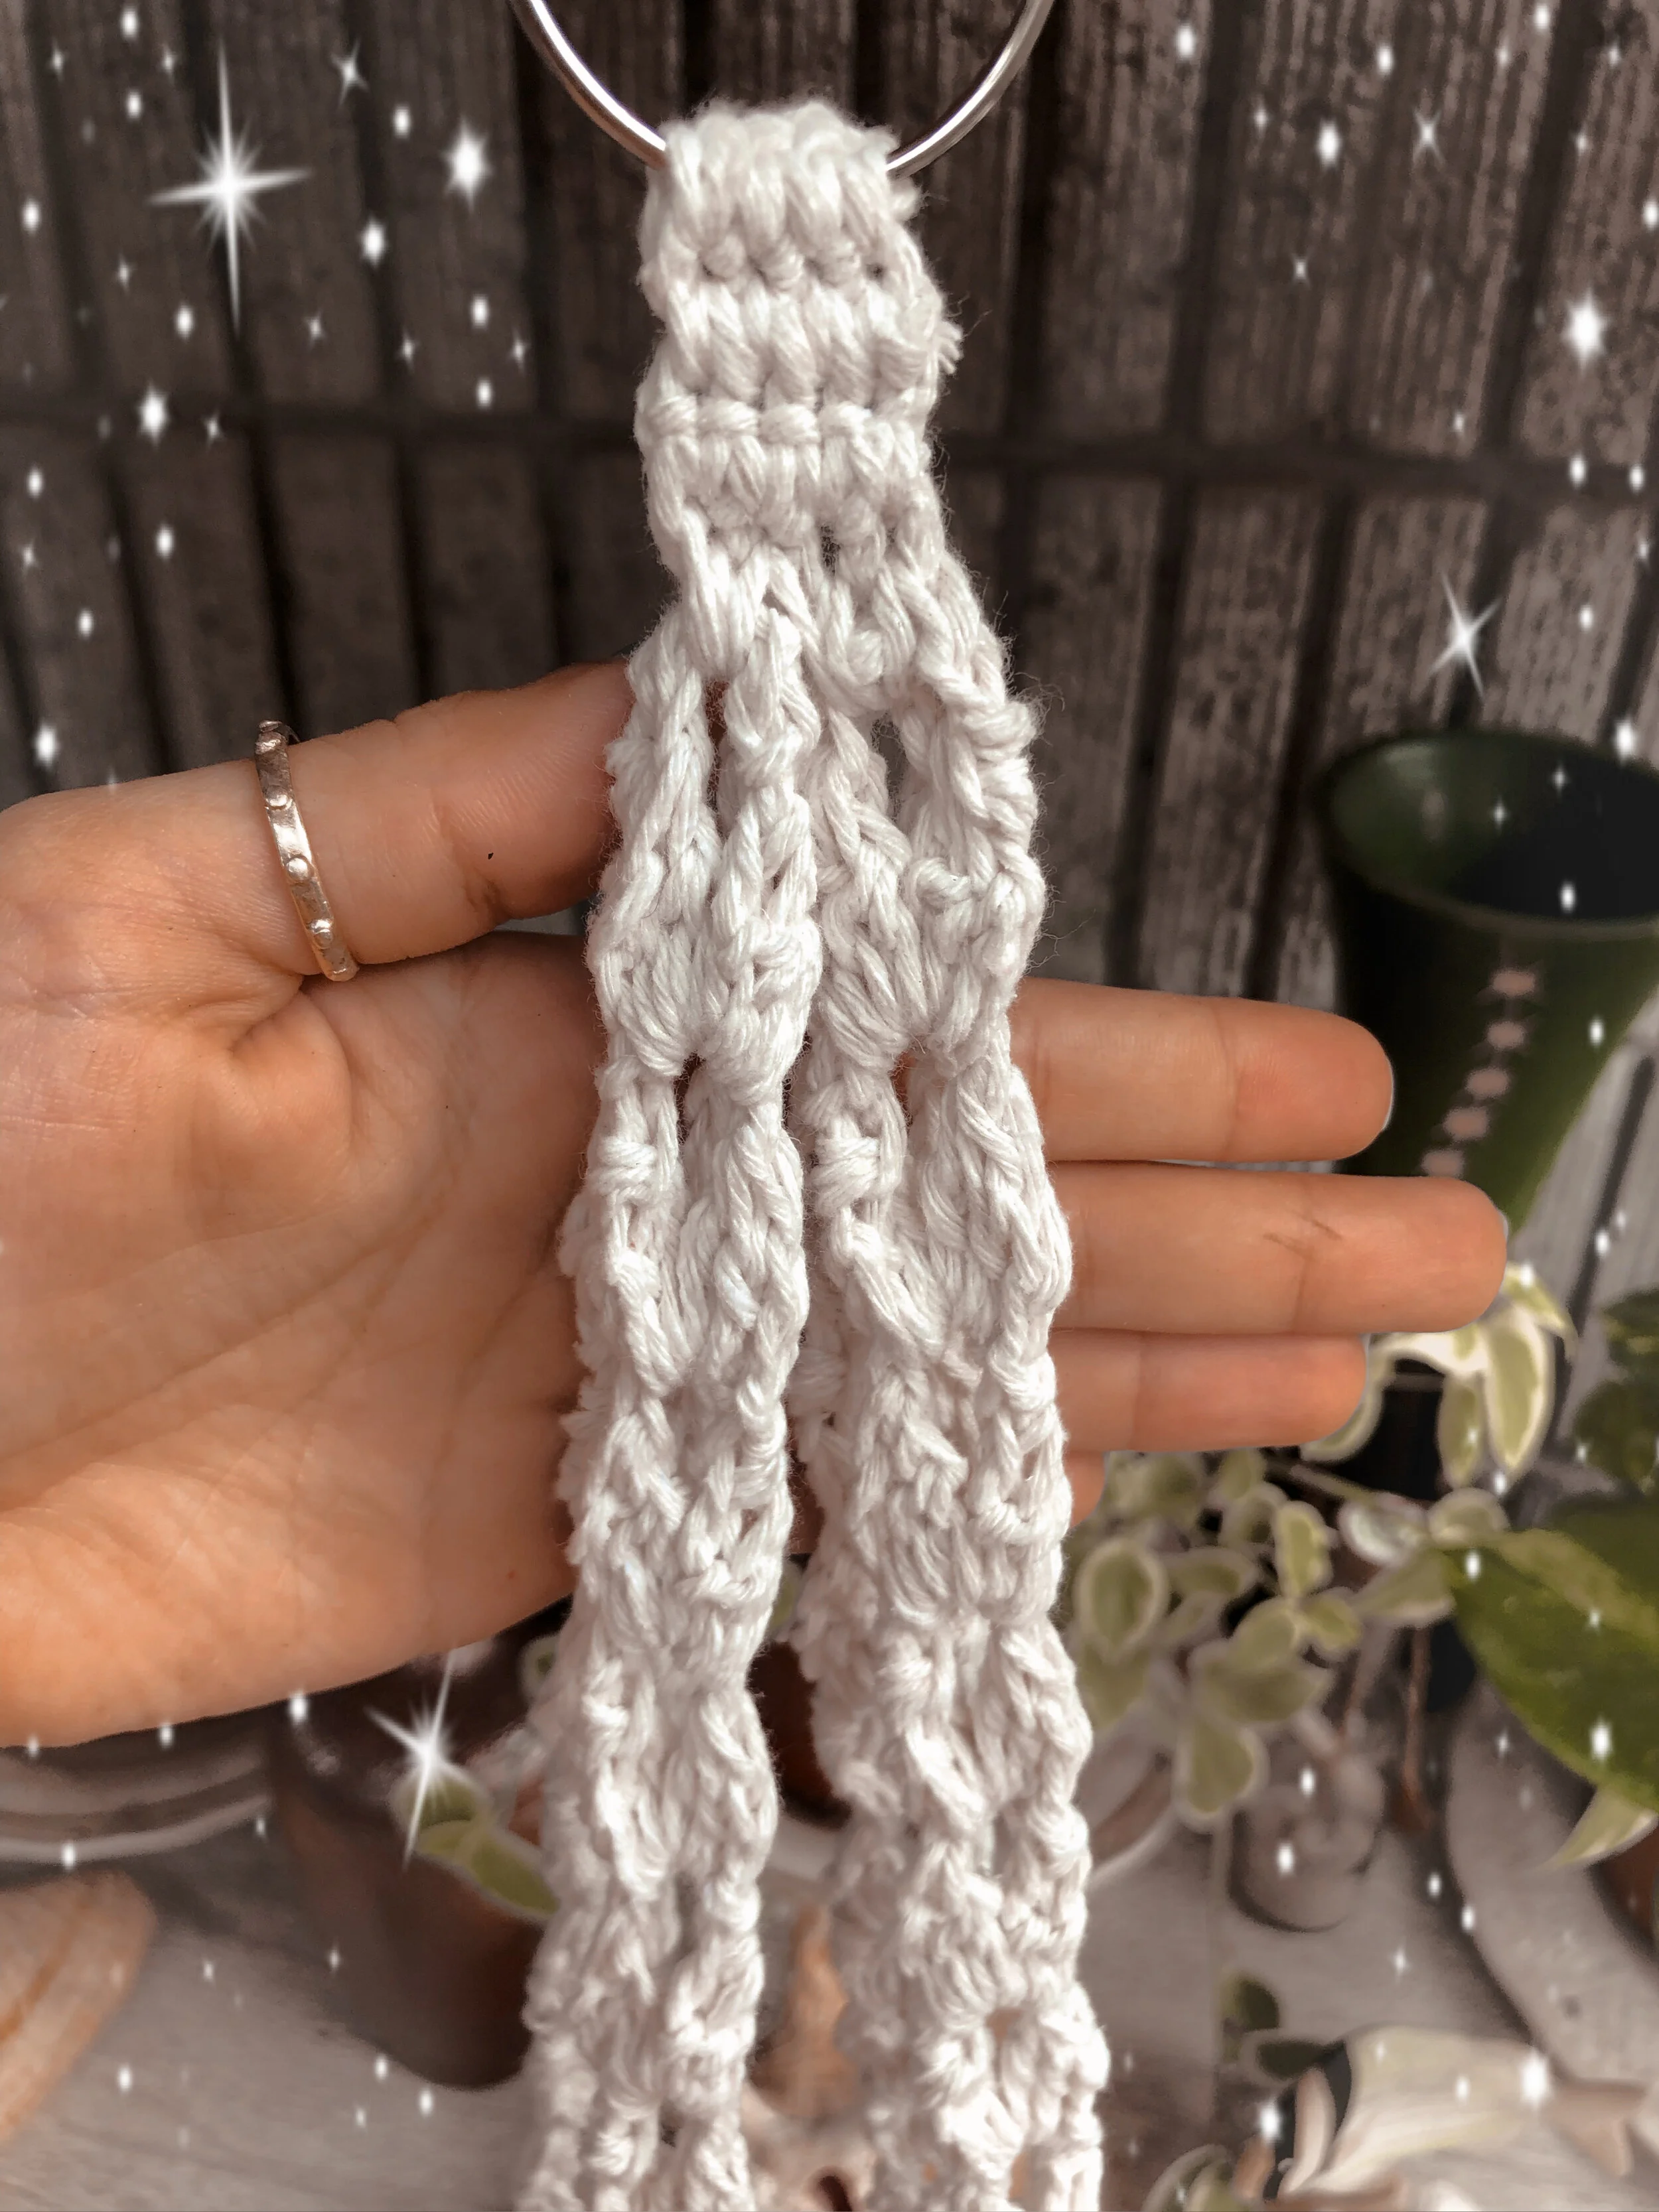
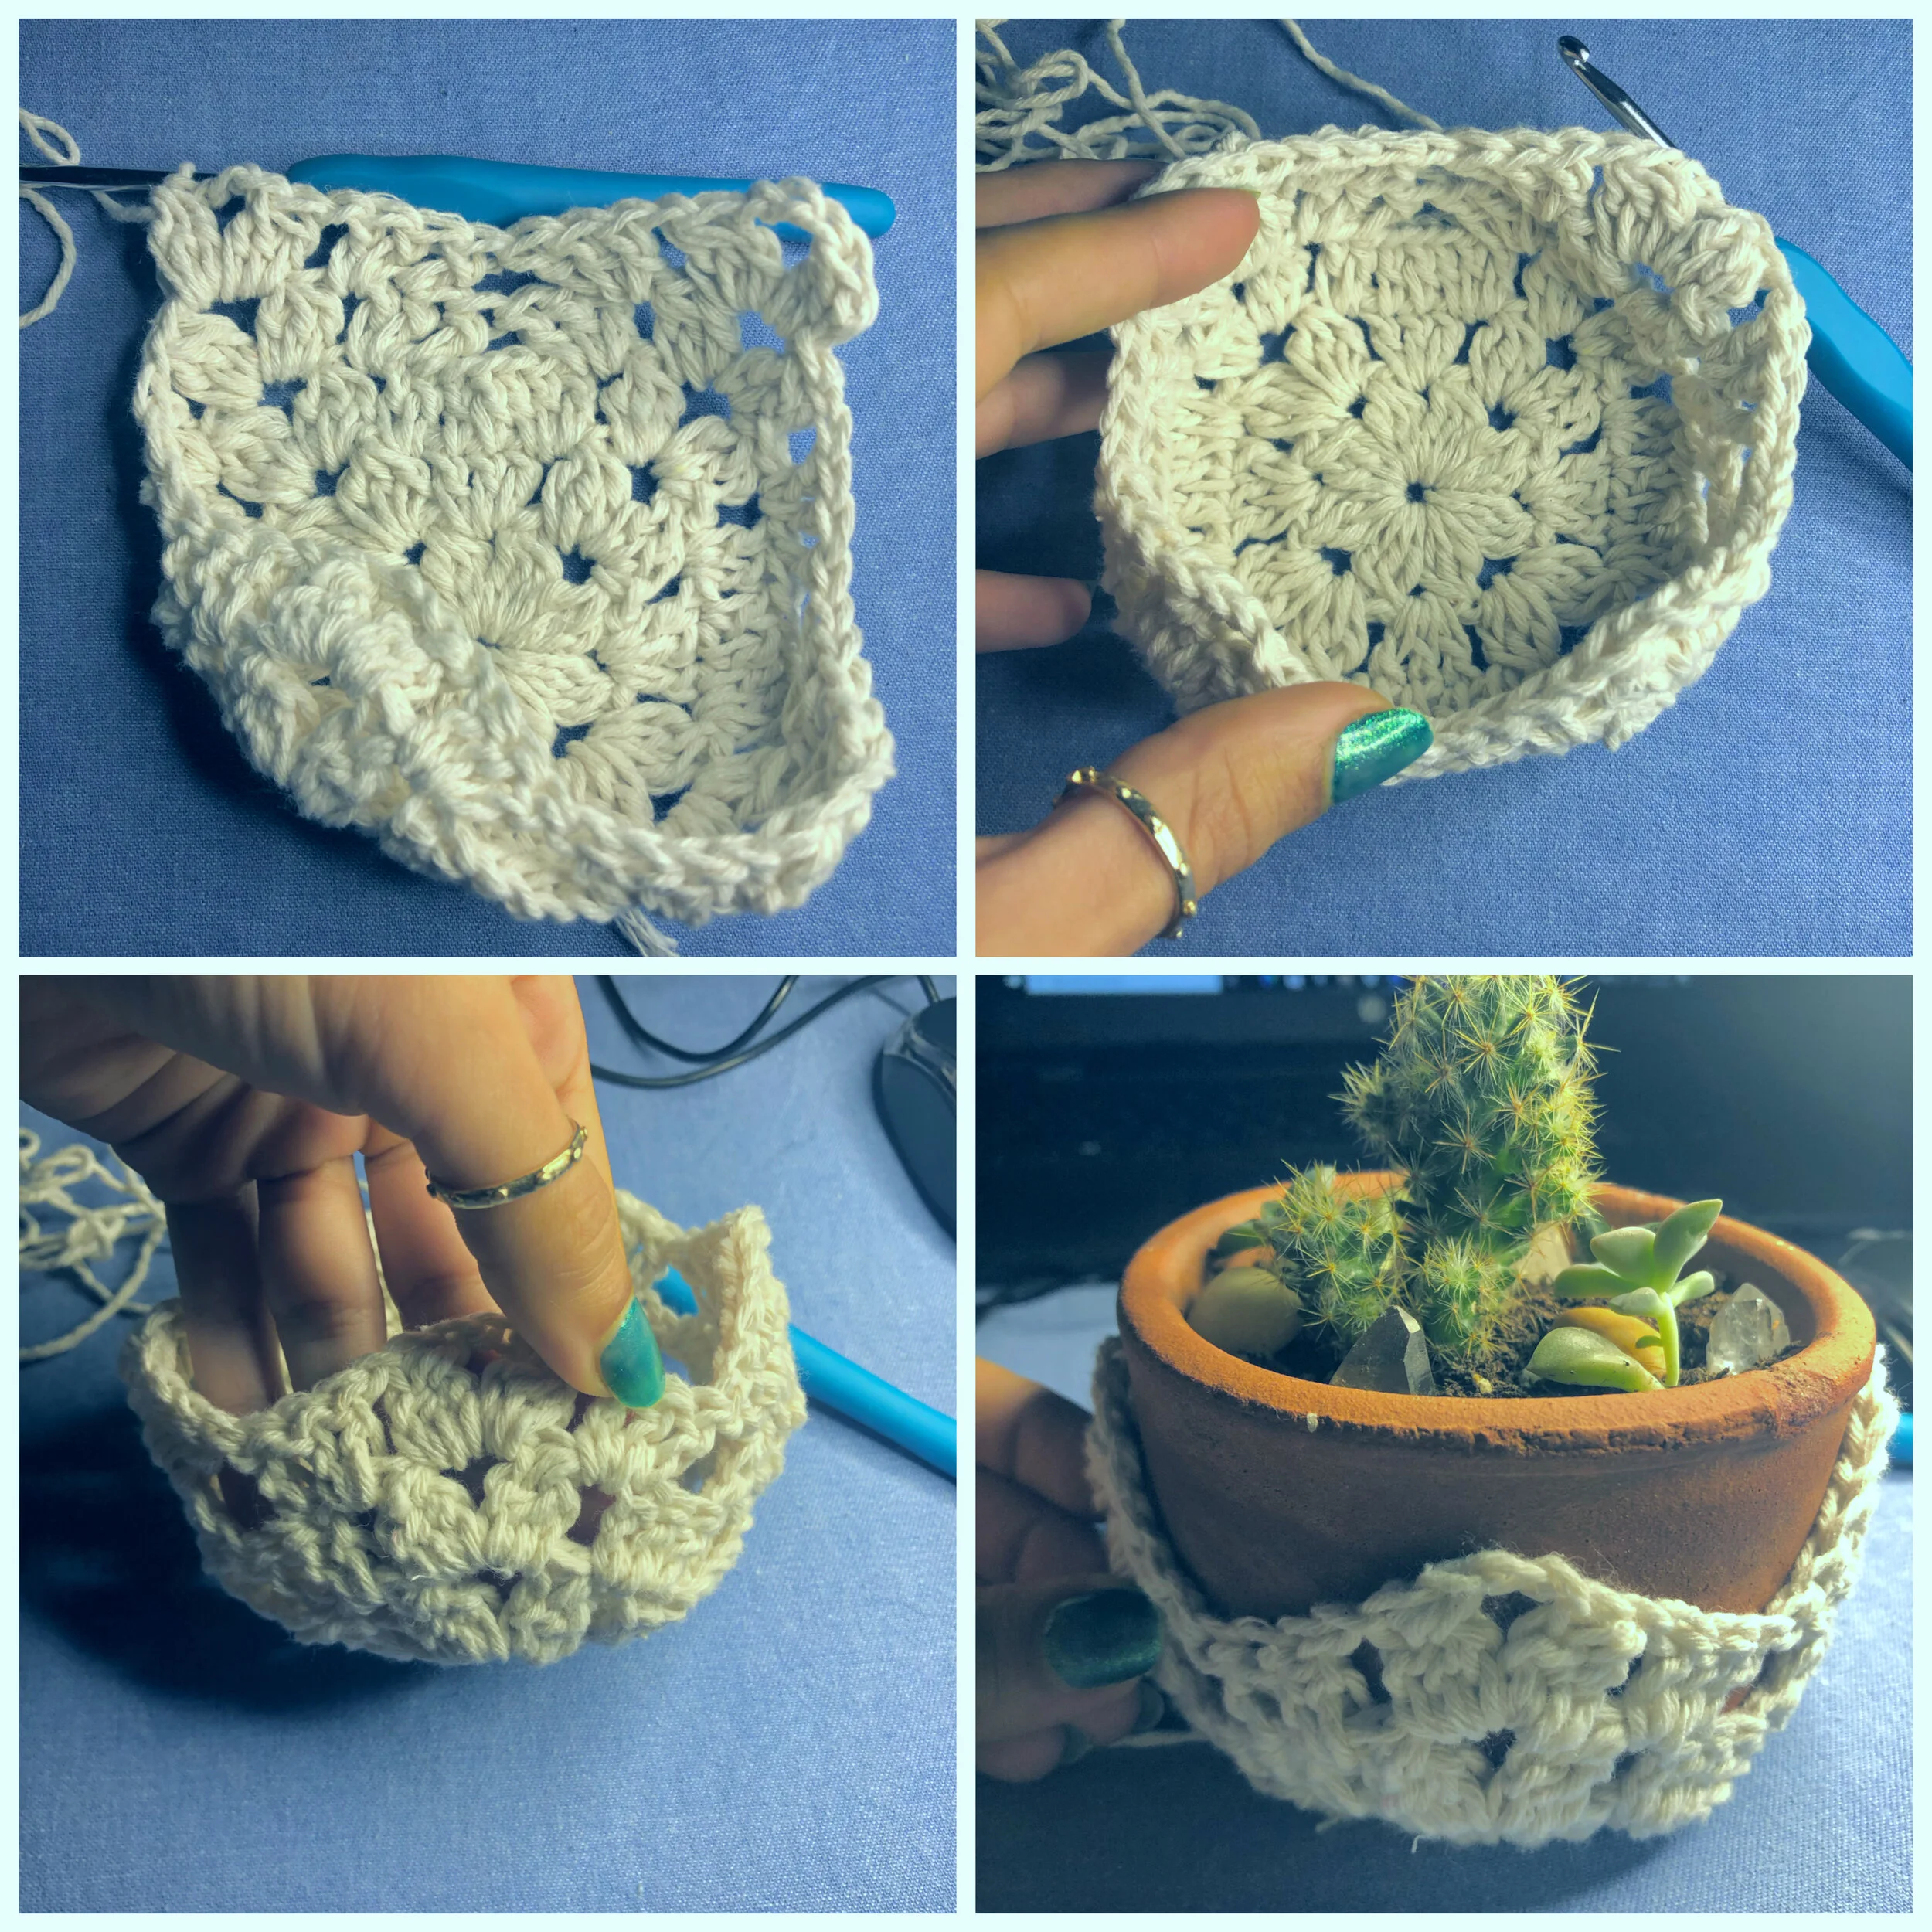
Fold and line up your work as shown in the photo.
CH1 & grab the 2 first cords together & SC 2 times into the center CH3 space around both cords.
Grab the next 2 cords together & SC 2 times into the center CH3 Space around both cords.
CH1 & turn your work. SC into each 4 stitches. CH1 & turn your work. SC into each 4 Stitches.
CH1 & turn your work. Grab your Ring of choice & place it close to your stitches shown in the photo.
This is so that we can SC around the ring. SC into each 4 stitches while also going around the ring.
Cut and fasten off your yarn.
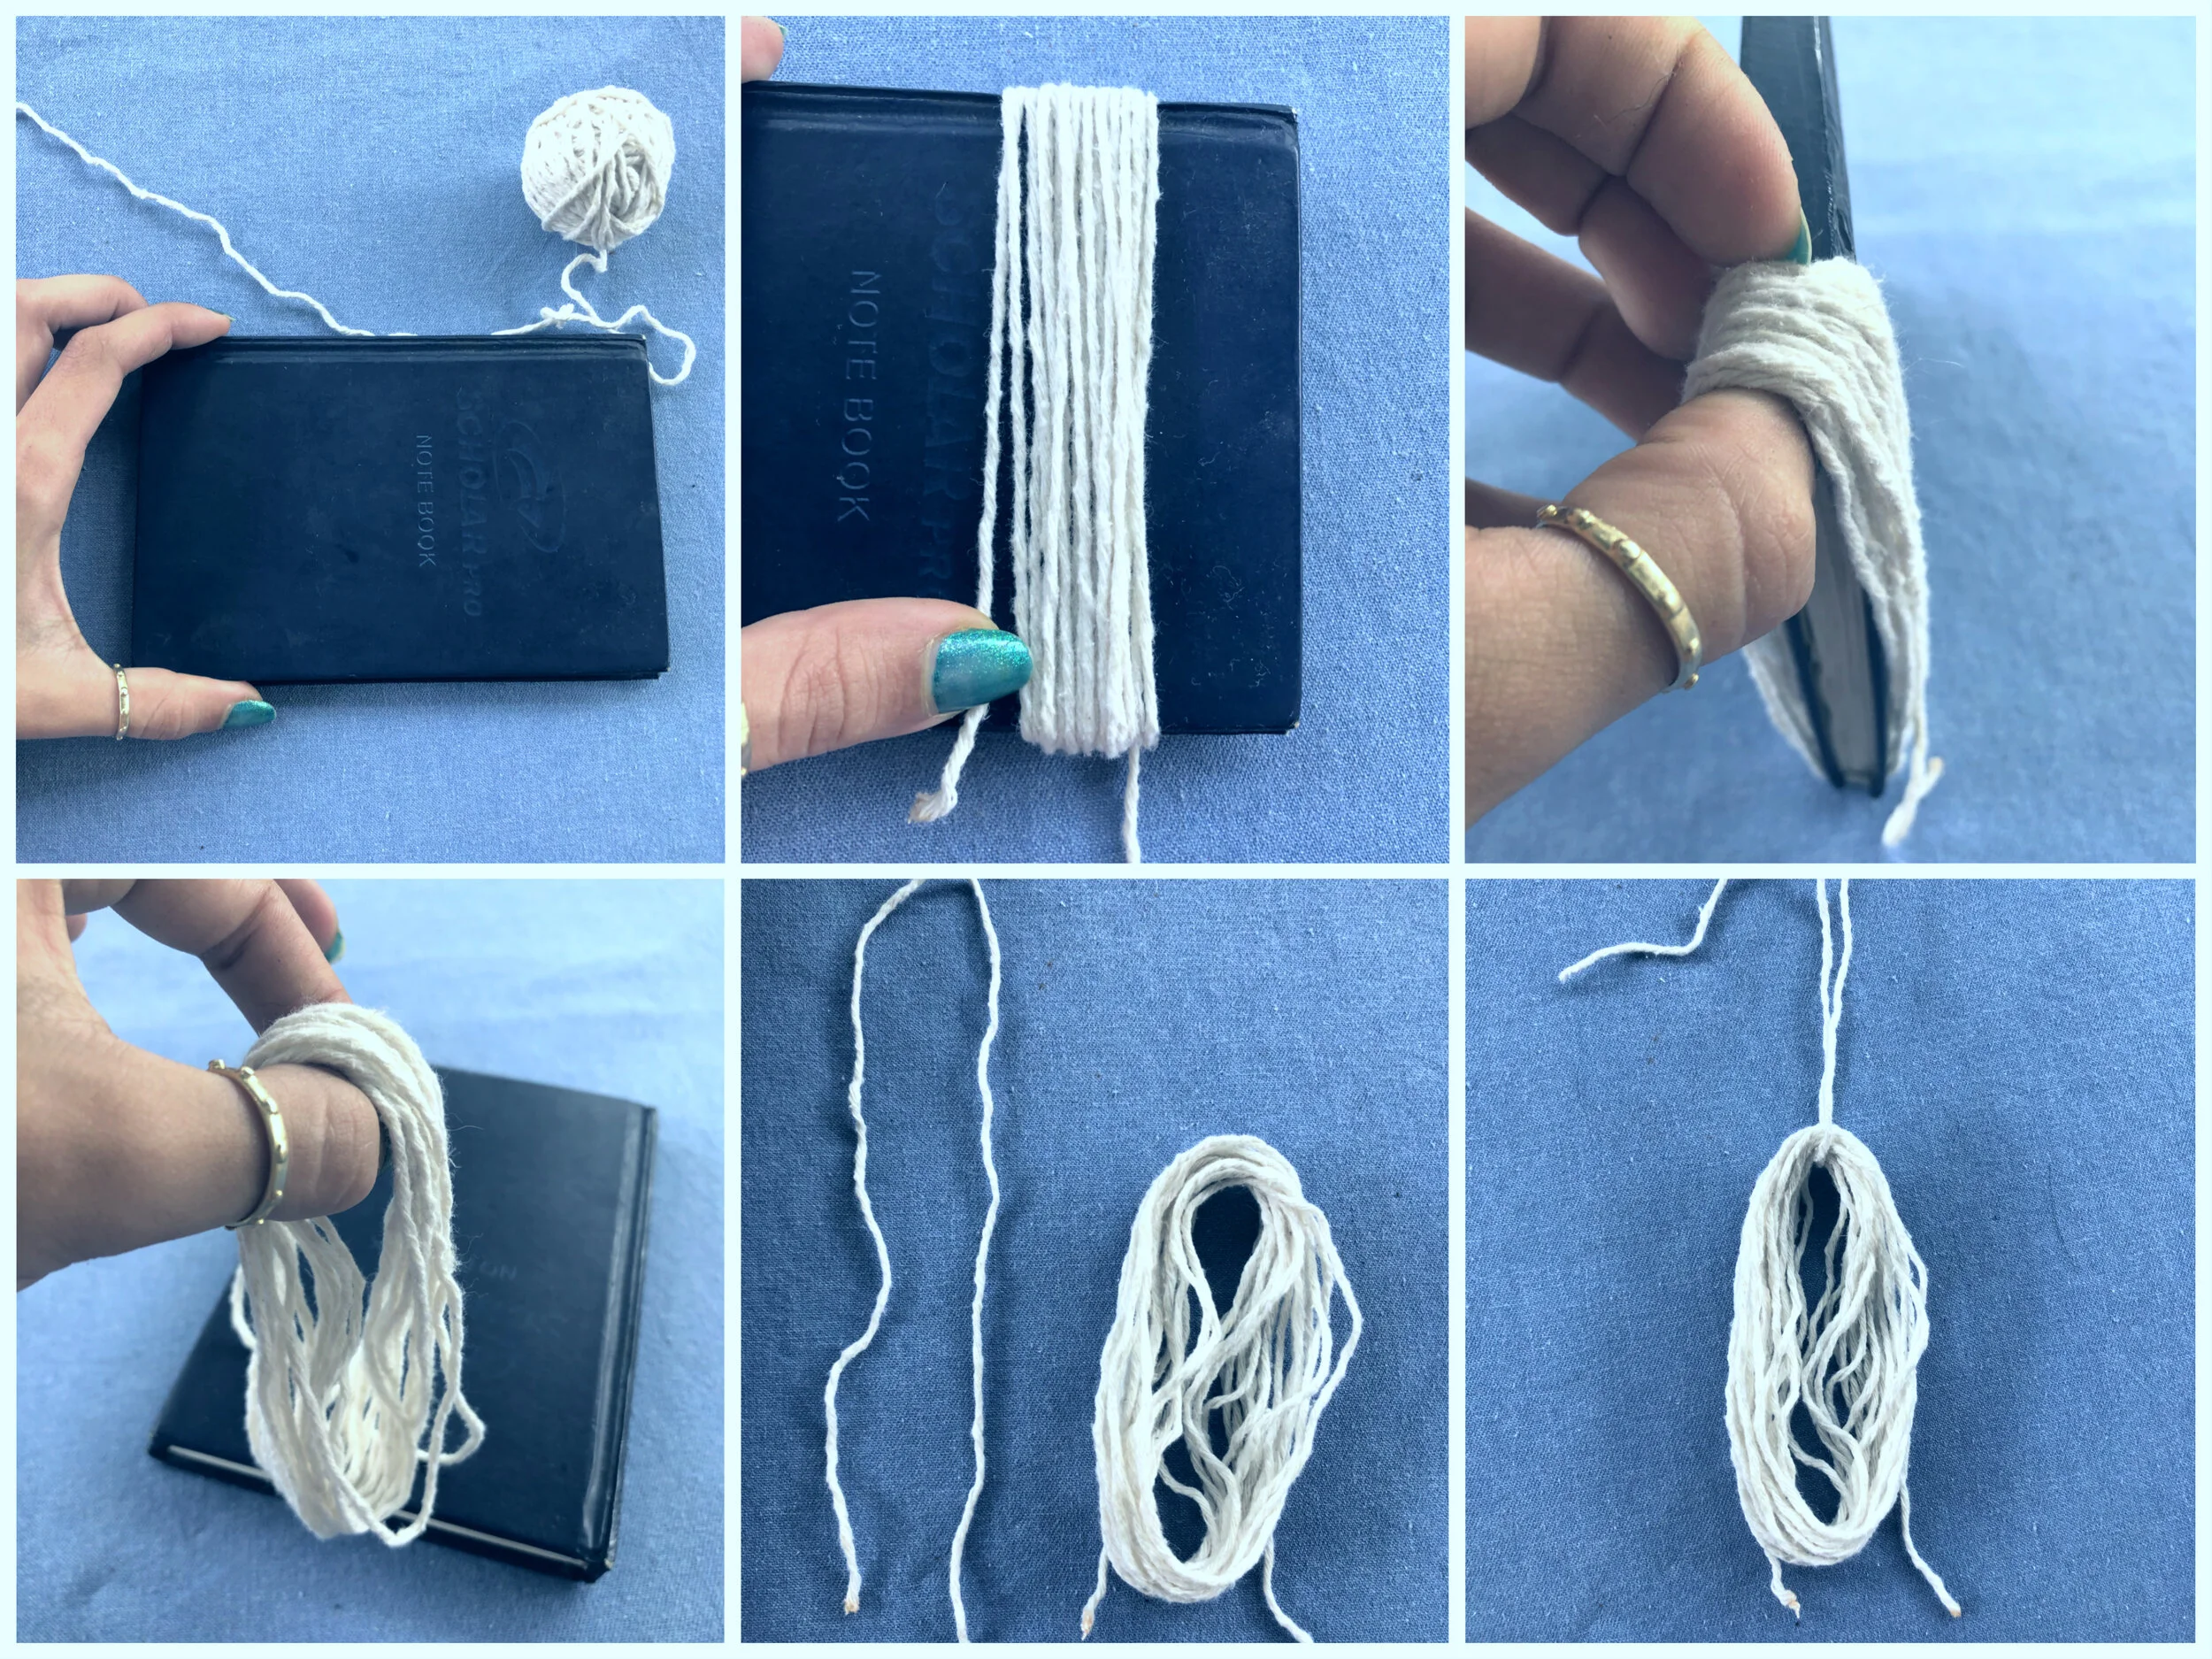
Now we are going to create your tassel! Use any small rectangular / square book / CD case as your guide.
Take your yarn and hold it at the bottom end with one finger while wrapping it around your book.
Wrap it around as many times as you like. Keeping in mind that the more rounds, the thicker and fuller your tassel will be.
In my case i wrapped it around 20 times. then cut yarn at the end.
Remove yarn while holding it in place as shown in the photos above.
Cut a piece of yarn fairly long, (it’s better to have more than less)
weave it through the hole at the to of your tassel. Tie a knot to keep it in place.
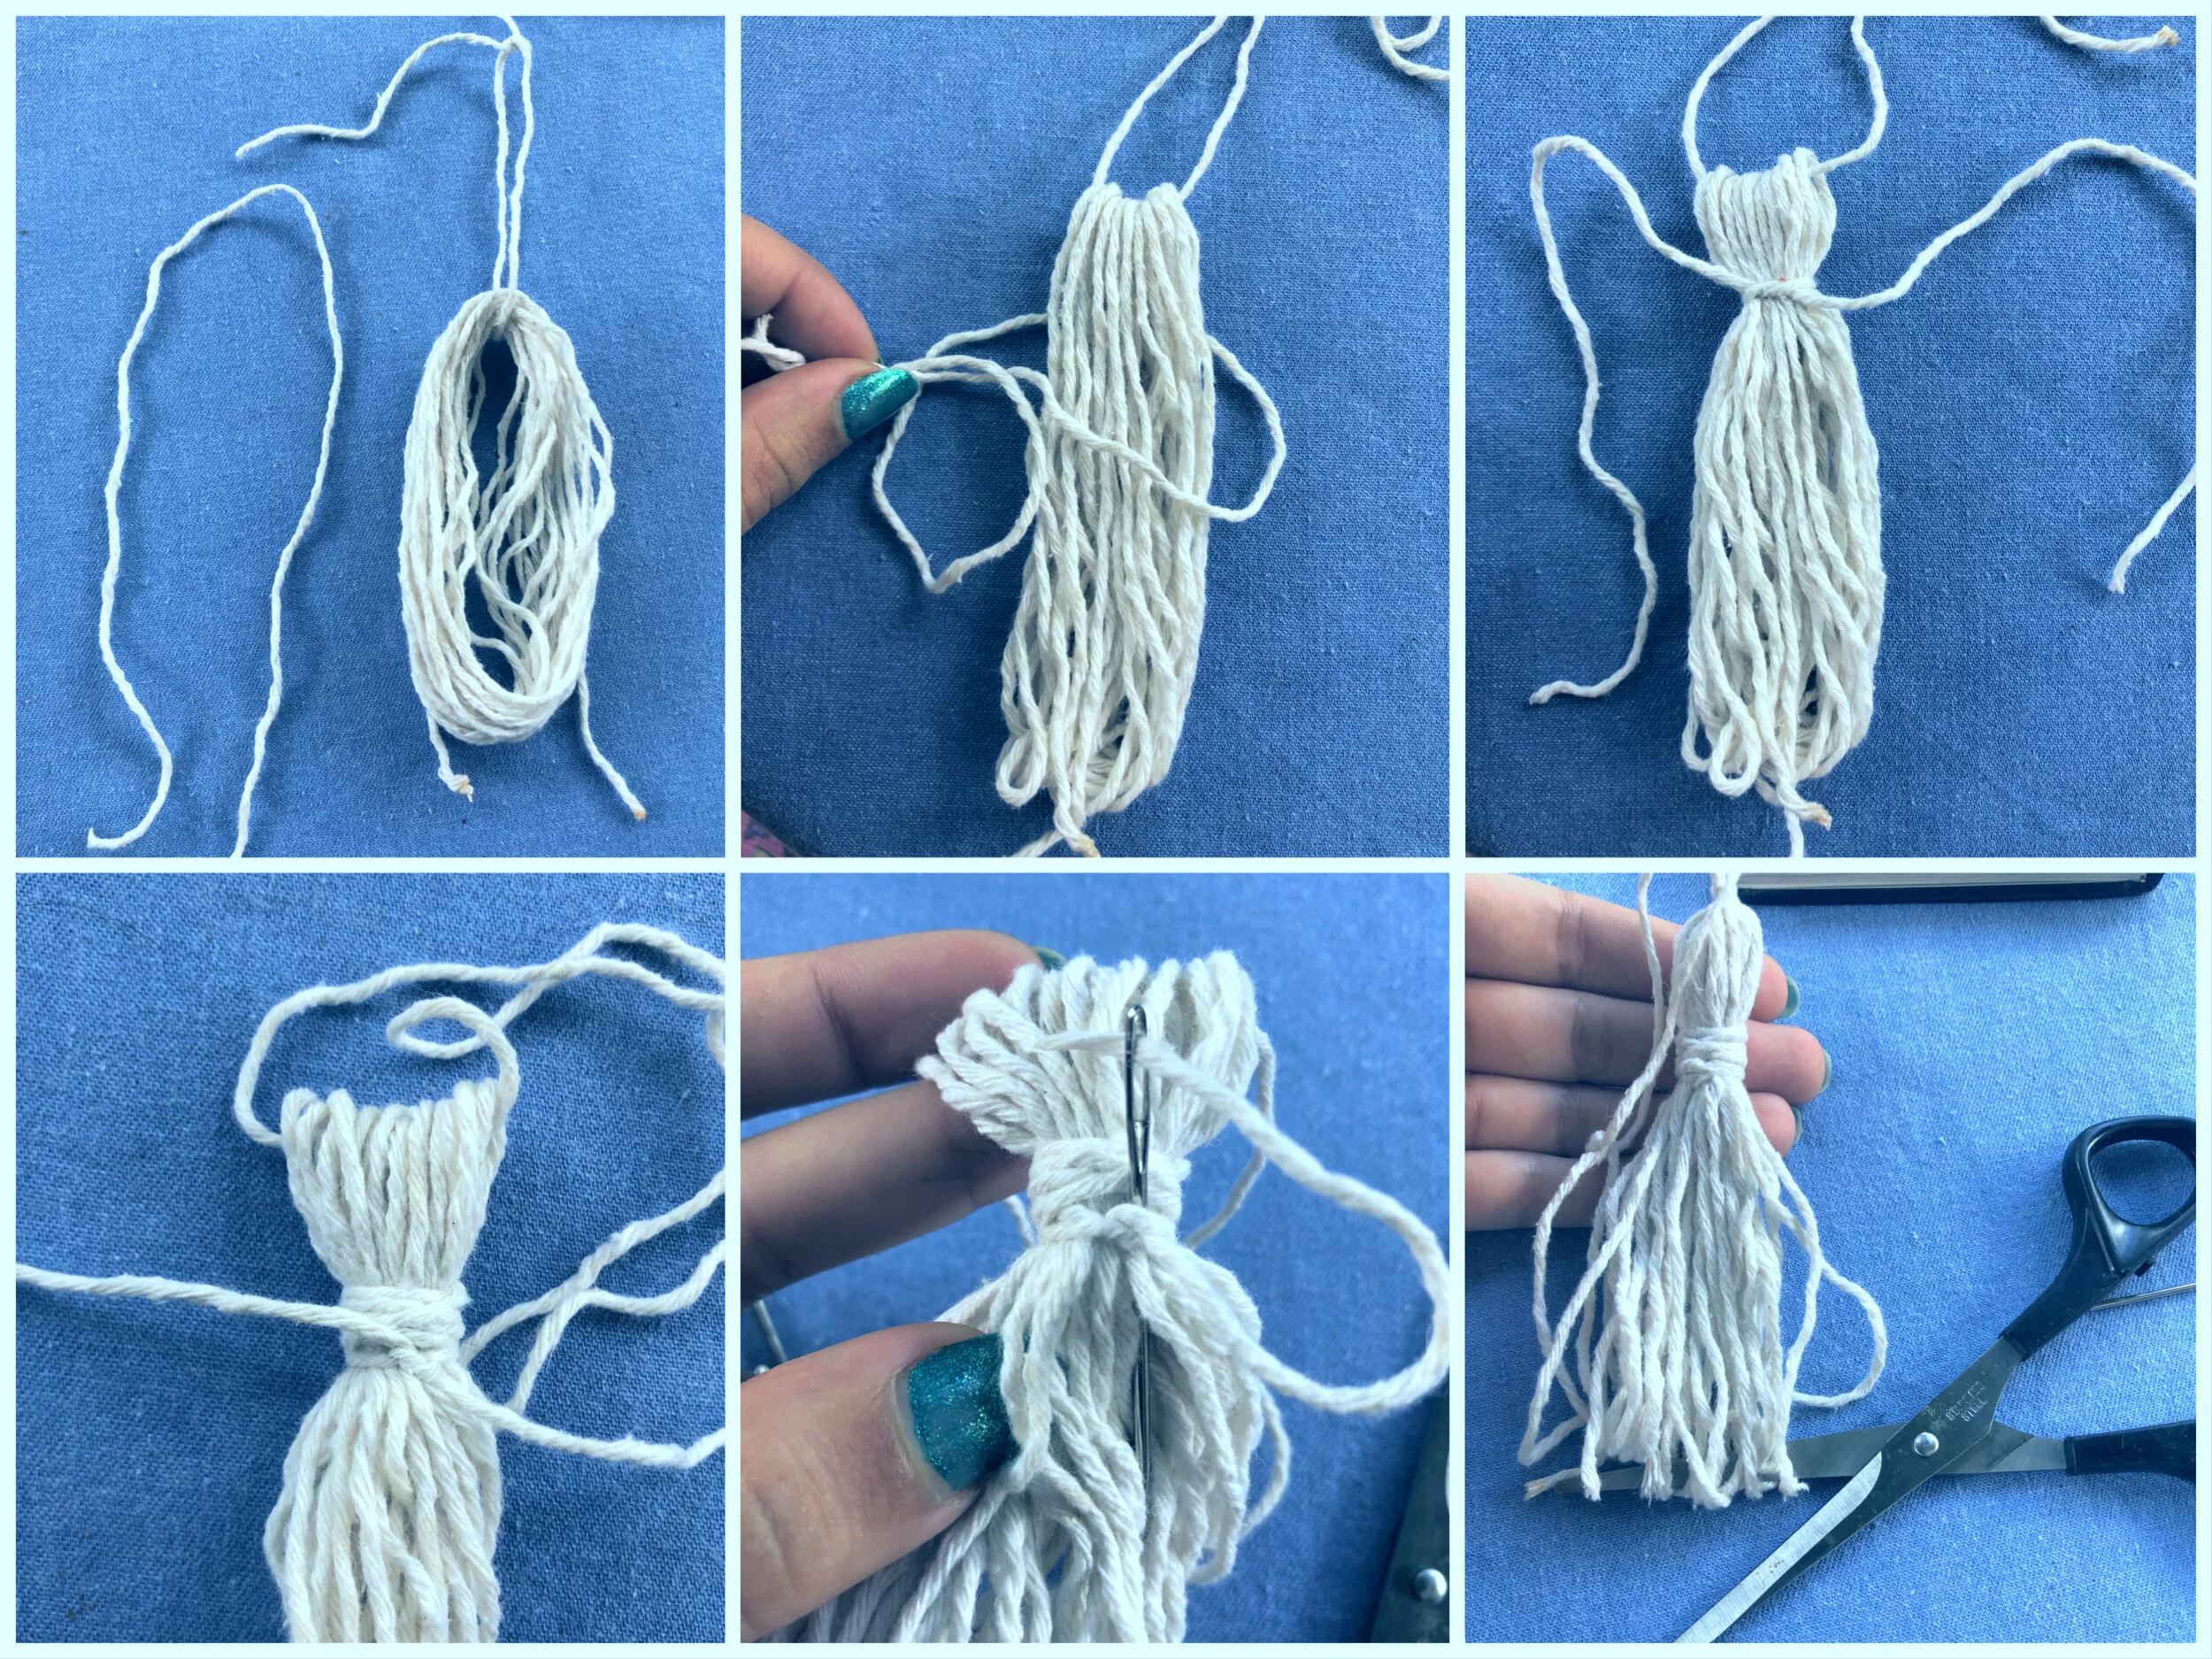
Cut another lengthy piece of yarn and wrap it around your tassel & tie a knot.
Continue wrapping each end around in the opposite directions until you have your desired look.
Grab your yarn needle & weave in the loose ends into the middle of the tassel to hide it.
Cut the end of your tassel & shape it into a straight line.
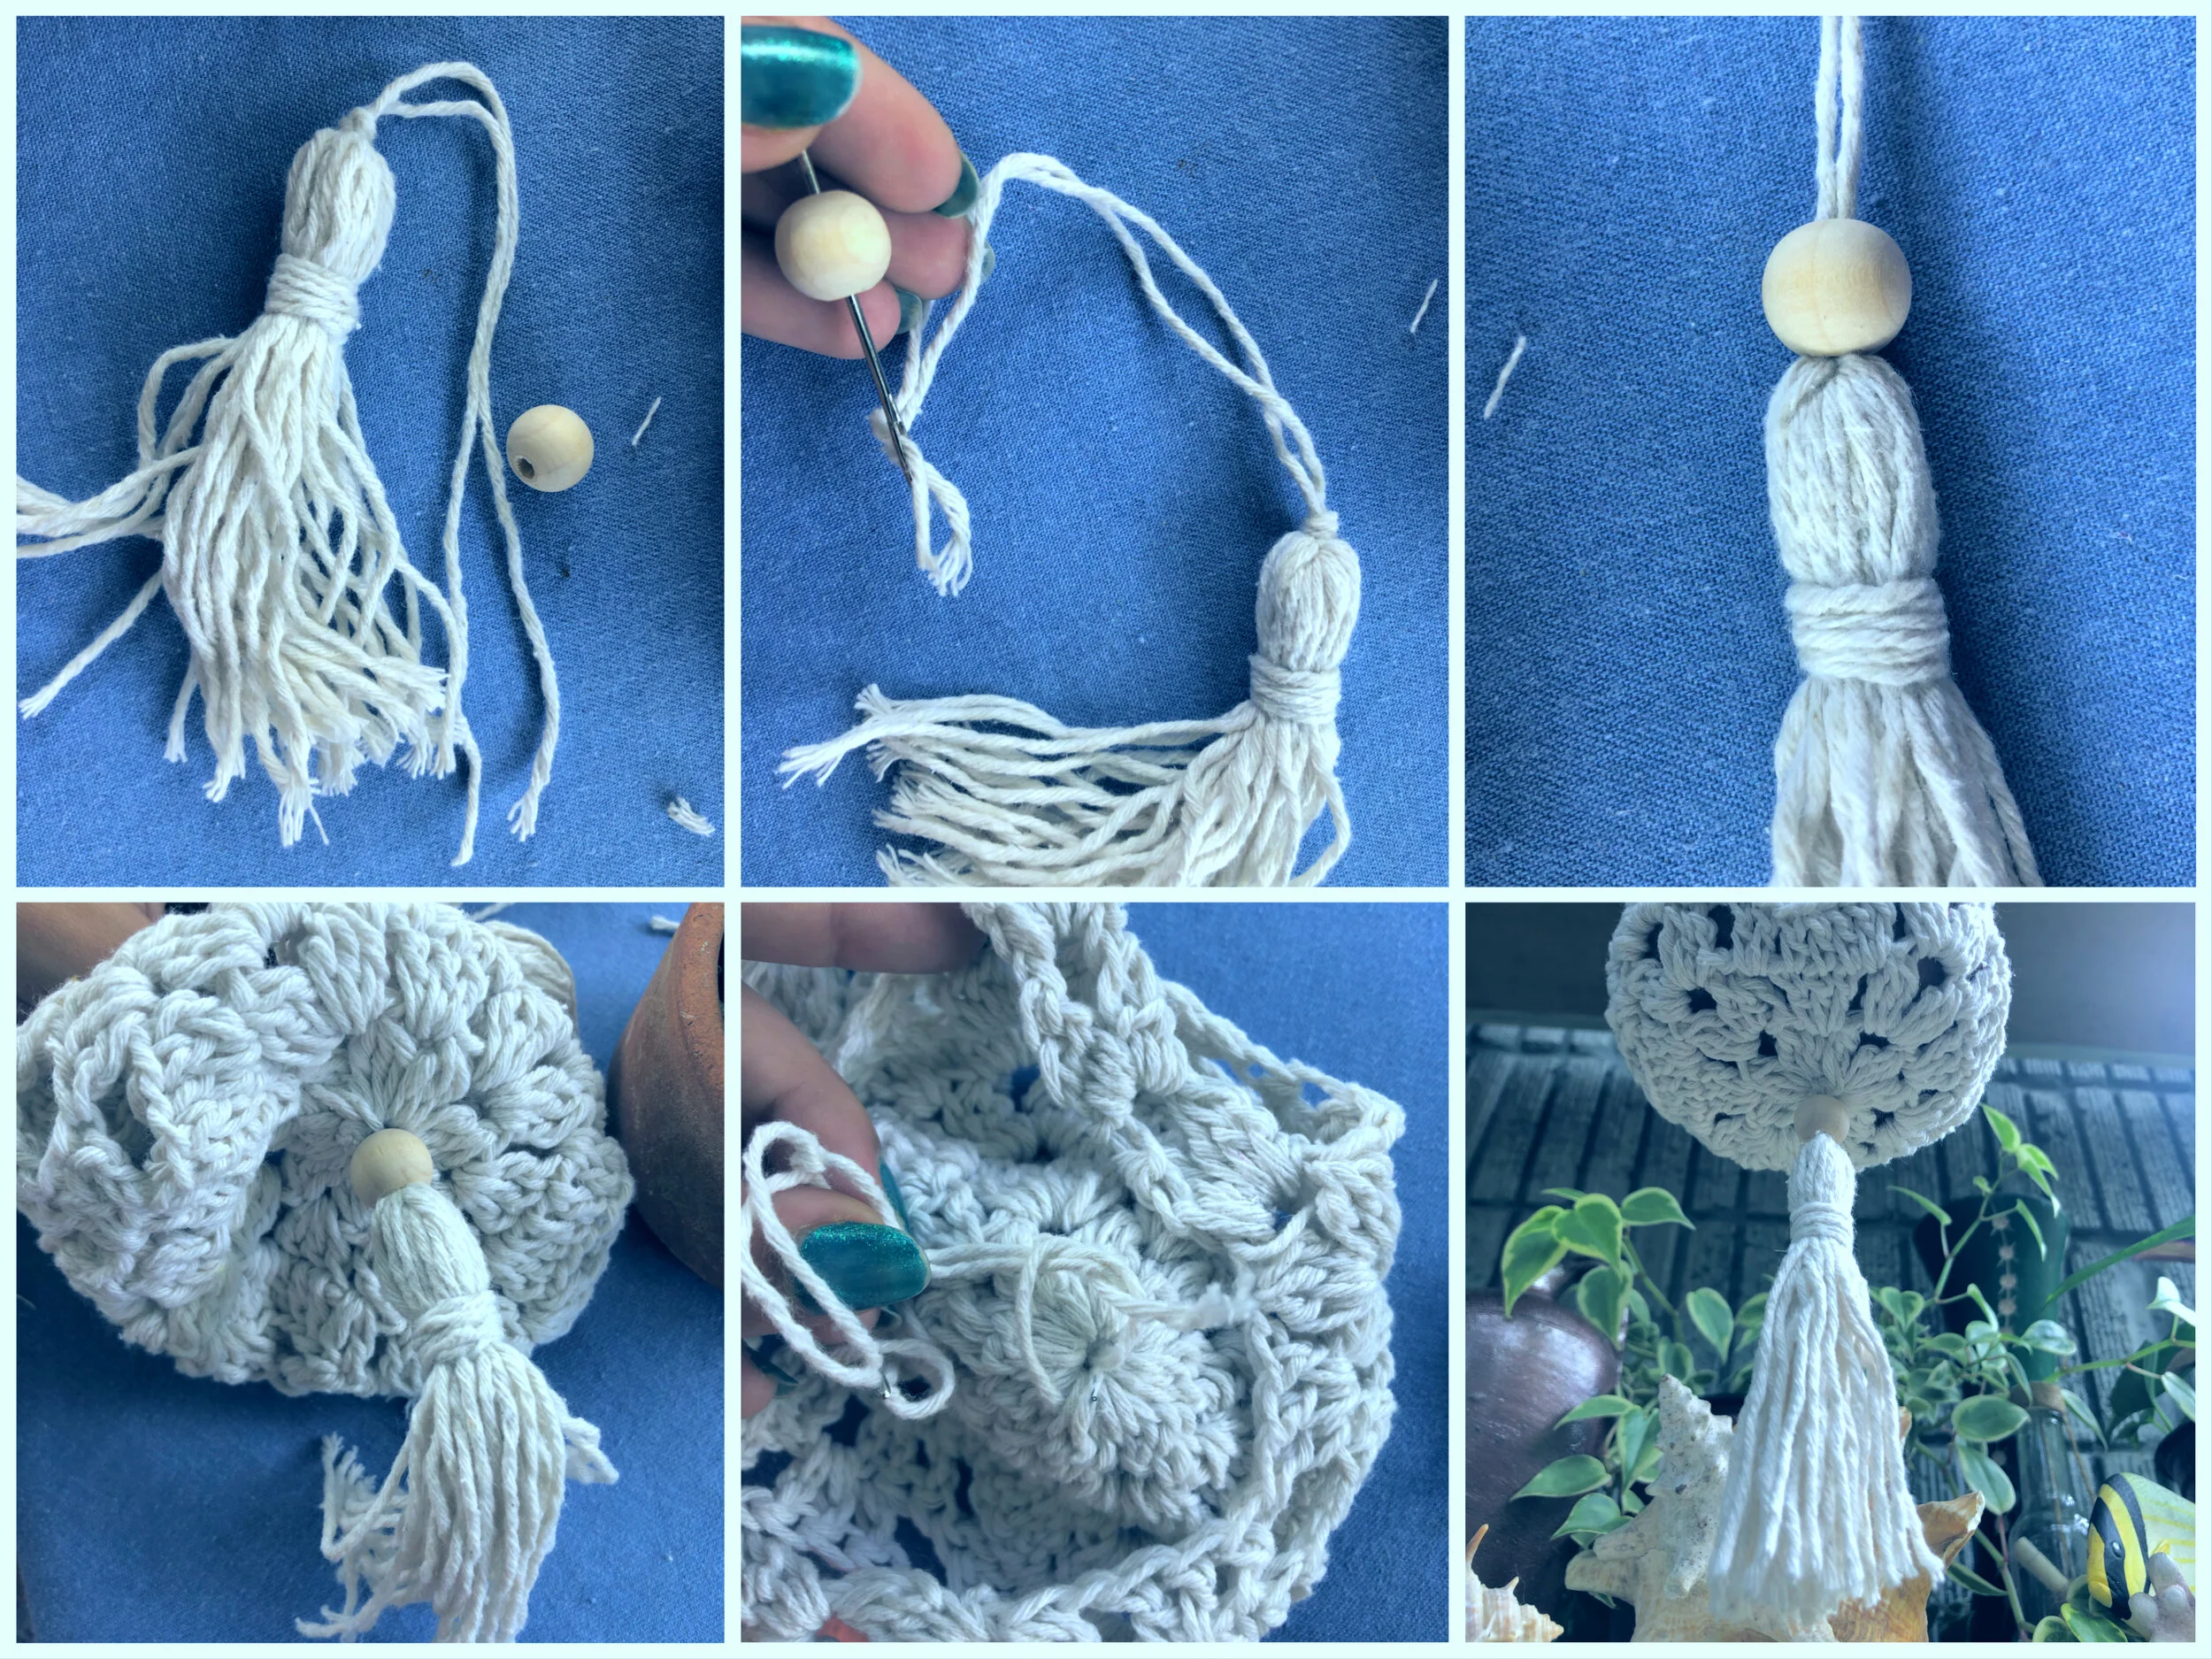
Now to add your wooden bead ! (optional)
Grab your bead & your needle & weave it into the loose ends at the to of your tassel.
Push your needle through the outer side of your plant hanger & Create a knot inside , holding it in place.
Weave in all your ends & let your cute plant sit comfortably in your very own plant hanger!